
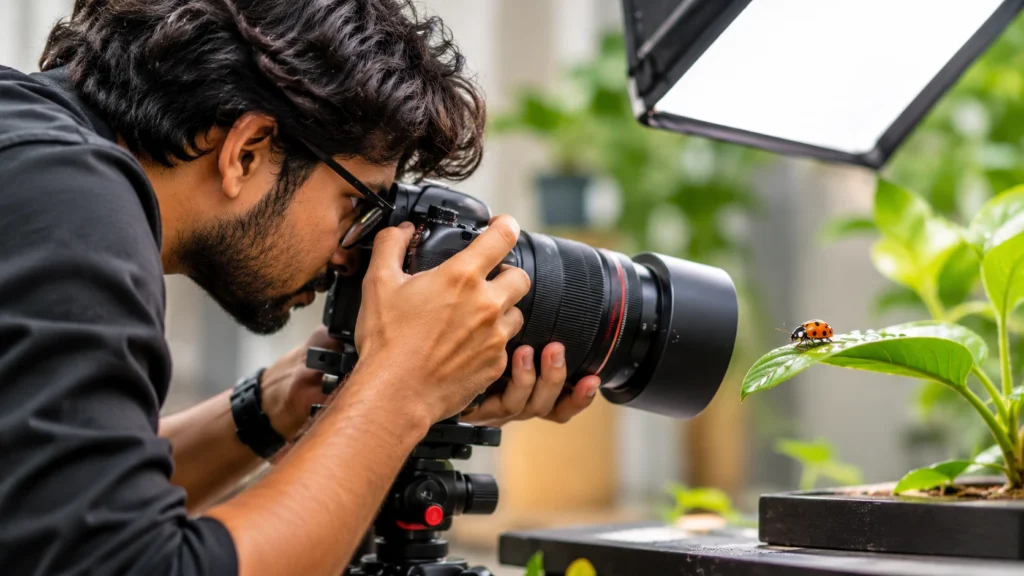
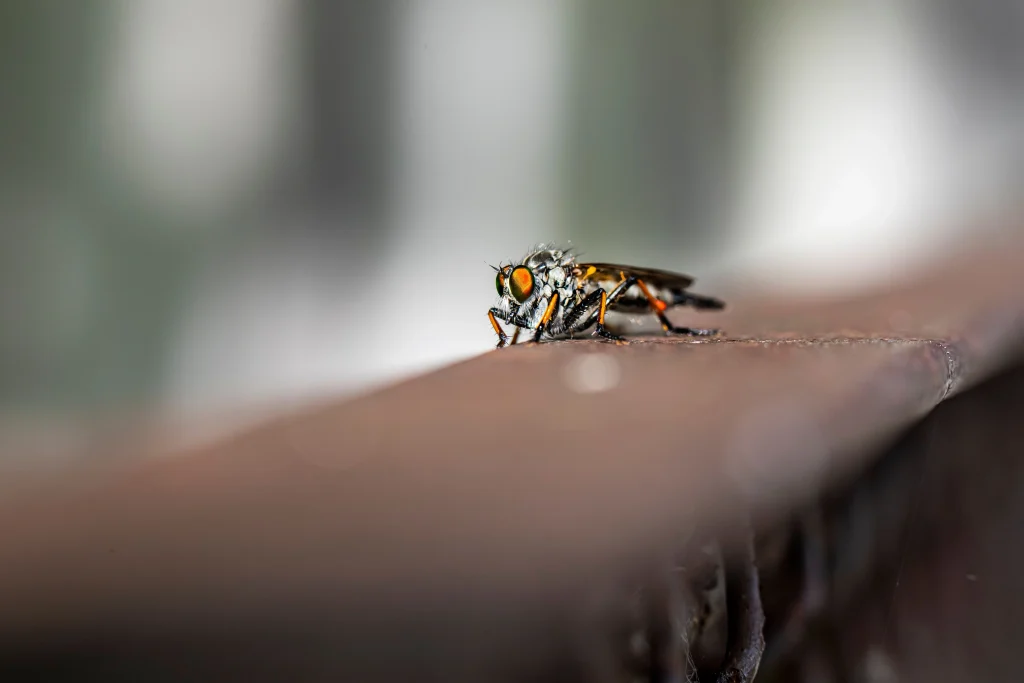
Macro Photography for Beginners: How to Capture Tiny Worlds
Quick answer: Macro photography is the art of photographing small subjects so they appear life-size or larger. The keys are a macro lens or close-up tool, a tripod, soft light, a small aperture, and careful focus. Get these five right, and your close-ups will look sharp and full of detail.
A single drop of water can hold a whole garden. A bee’s eye can look like a jeweled dome. Your own backyard is full of scenes like these, and most people walk past them every day. That hidden beauty is what makes macro photography so rewarding.
This guide covers macro photography for beginners from start to finish. You will learn about gear, camera settings, focus, light, composition, subjects, and editing. Every tip works with a dedicated camera or a modern phone. Read it once, then use the checklist on your next shoot.
What Is Macro Photography?
Macro photography is close-up photography that shows small subjects at high magnification. In strict terms, a lens is “macro” when it can project the subject onto the sensor at 1:1, or life-size. That means a 10mm insect fills 10mm of the sensor.
Many people use the term for any tight close-up, and that is fine for macro photography for beginners. What matters is that you can see details the eye usually misses: veins in a leaf, hairs on a spider, grains in a pinch of salt.
Most shoots fall into these types:
- Nature: Flowers, insects, leaves, and dew
- Water and liquid: Drops, bubbles, and ripples
- Everyday objects: Coins, fabric, keys, and tools
- Food: Berries, spices, and honey
- Jewelry and watches: Fine detail in metal and stone
- Abstract: Colors, patterns, and surfaces
Why Macro Photography Is Worth Learning
It is one of the cheapest genres to start. You do not need to travel, hire a model, or wait for perfect weather. A kitchen table and a window are enough.
It also trains your eye. You learn to slow down, study light, and notice small shapes. Those habits improve all your other work, from portraits to landscapes. Because the subjects are tiny, you can practice macro photography for hours without leaving home.
There is a business side too. Stock agencies, product brands, and jewelers all need sharp close-ups. A strong set of detail images can lead to paid work.
Macro Photography for Beginners: Understanding Magnification
Magnification is the ratio between the real size of a subject and its size on the sensor. It is the key number in macro photography.
- 1:1 is life-size. This is true macro.
- 1:2 is half life-size. Many “macro” zooms stop here.
- 2:1 is twice life-size. It needs special gear.
Working distance is the space between the front of the lens and the subject. A 100mm macro lens gives you more room than a 50mm. That helps with skittish insects and with getting light onto the subject. Minimum focus distance is the closest the lens can focus. Check both numbers before you buy.
Gear for Macro Photography
You do not need a huge kit. Start simple and add tools when you need them.
1. A Camera With Manual Control
Any camera with manual mode suits macro photography. A mirrorless or DSLR gives you the most control. Many phones also offer close-focus modes that work well for small shops and casual shooters.
2. A Macro Lens
A dedicated macro lens is the best tool for macro photography. Focal lengths from 90mm to 105mm are popular because they give natural working distance and sharp detail. A 60mm lens is lighter and cheaper, but you must get closer to the subject.
3. Budget Options
You can start macro photography for beginners without a macro lens. Try these low-cost tools:
- Extension tubes: Hollow rings that move the lens farther from the sensor so it focuses closer
- Close-up filters: Screw-on glass that works like reading glasses for your lens
- Reverse rings: Let you mount a lens backward for very high magnification
These cost little and teach you the basics before you spend more.
4. A Sturdy Tripod
Every tiny shake shows up in a close-up. A tripod keeps the frame steady. Choose one that can go low to the ground and hold the camera at odd angles.
5. Lights and Diffusers
Ring lights, small LED panels, and flashes with diffusers help in dim spots. A white card bounces light into shadows. A thin white cloth softens harsh sun.
6. Small Helpers
A focusing rail, a plant clamp, a spray bottle for dew, a remote release, and a microfiber cloth all earn their place in the bag. A foam board makes a handy windbreak.
Camera Settings for Macro Photography
Start with these settings and adjust to the scene:
- Mode: Aperture priority or manual
- Aperture: f/8 to f/16, depending on the depth you need
- ISO: 100 to 400
- Shutter speed: 1/200 or faster handheld; slower is fine on a tripod in still air
- Focus: Manual, with live view zoom
- White balance: Daylight or custom
- File format: RAW
These settings keep macro photography sharp and clean. Avoid very small apertures, such as f/32. They add diffraction, which softens fine detail.
Why Depth of Field Is So Thin
At high magnification, depth of field shrinks to a sliver, sometimes a single millimeter. A wider aperture makes it thinner. A smaller aperture gives more depth but costs sharpness past about f/16. Find the balance for each shot, and decide which part of the subject matters most.
Focus: The Hardest Part of Macro Photography
Autofocus often hunts at close range. Switch to manual focus and use live view magnification to check the result. Even better, set the focus ring to a fixed distance and move the whole camera slightly forward or back until the subject snaps into focus. This is called rocking.
Because depth of field is so thin in macro photography, tiny movements matter. Even your breathing can shift the focus. Use a focusing rail to move the camera in very small steps. Focus on the eye of an insect or the nearest edge of a petal. If the eye is sharp, viewers forgive soft areas elsewhere.
Focus Stacking in Macro Photography
Focus stacking is the pro answer to thin depth of field. You take several frames at different focus points, then blend them in software. Each frame is sharp in a different slice, and the final image is sharp throughout.
Use a tripod and a focusing rail. Keep the light constant. Shoot 10 to 50 frames, depending on the subject and magnification. Blend them in Photoshop, Helicon Focus, or Zerene Stacker. Stacking works best on still subjects such as flowers, jewelry, and small products.
Light for Macro Photography
Light is everything in macro photography. Subjects are small, shadows fall fast, and the lens often blocks the light you have.
Use Soft Natural Light
Overcast days and open shade give even, gentle light. Early morning is ideal. The air is calm, insects are slow, and dew still clings to petals.
Add a Diffuser
A thin white cloth or a pop-up diffuser turns harsh sun into soft light. Hold it above the subject so shadows fade.
Use a Reflector
A small white card bounces light into the dark side of a subject. Move it in small steps and watch the shadows change.
Try Flash
A ring flash or a twin flash gives even light and freezes motion. Diffuse it, or the highlights will blow out. Even a plastic cup or a piece of tissue over a small flash can help.
Watch the Lens Shadow
At close range, the lens can cast a shadow on the subject. Move the light to the side, or use a longer lens for more distance.
Composition Tips for Macro Photography
A clean composition keeps the eye on the subject.
- Choose a clean background. Move a step to the side to blur clutter.
- Keep the sensor parallel to the subject when you want the whole shape sharp.
- Use the rule of thirds, or center a perfect pattern.
- Look for color contrast. A red ladybug on a green leaf pops.
- Show texture. Side light reveals ridges, hairs, and grain.
- Leave space in the direction an insect faces.
- Check the edges for stray blades of grass and bright spots.
Move slowly around the subject before you shoot. A change of just a few centimeters can turn a busy scene into a clean one.
Macro Photography Subjects to Try
Flowers
Flowers are patient models. Shoot at dawn for dew, and use a windbreak to keep petals still. Look for the center, the edge of a petal, or the pattern of stamens.
Insects
Insect macro photography needs patience. Shoot on cool mornings when insects are slow. Approach gently, move slowly, and avoid casting your shadow on them. Focus on the eye, and take many frames.
Water Drops
Use dew, a spray bottle, or a dripping tap. Place a colored sheet behind the drops and light it from behind. Each drop works like a tiny lens and shows an upside-down view of the scene.
Everyday Objects
Some of the best macro photography for beginners starts with objects in your own home. Try a coin, a feather, a watch face, the tip of a pencil, or the weave of a scarf. You will see textures you never noticed.
Food
Berries, spices, salt, and honey look striking up close. Use fresh items, and shoot quickly before they change.
Jewelry
Use a light tent, a tripod, and focus stacking. Clean each piece first. Dust and fingerprints show up at high magnification.
Macro Photography for Beginners at Home
You can learn a lot without leaving your house. Try these setups:
- Window-sill studio: Place a small table near a window. Add a white card opposite the window to fill shadows.
- Kitchen shots: Photograph salt, sugar, citrus peel, or a cut herb.
- Water drops: Drip water on a leaf or a glossy surface.
- Coin and stamp details: Show engraving, ink, and texture.
- Soap bubble patterns: Look for swirls of color in the film.
- Fabric and paper: Notice weave, fibers, and folds.
These ideas make macro photography for beginners cheap and easy. You control the light and the subject, so you can repeat a shot until it works.
Outdoor Macro Photography Tips
Gardens, parks, and balconies are full of subjects. Follow these steps for good results:
- Scout early in the morning, when it is calm and cool
- Check the wind and use a foam board as a windbreak
- Kneel or lie down to reach eye level with the subject
- Move slowly and avoid casting a shadow
- Wear soft-soled shoes and plain clothes
- Be ready to wait. The best frames often come after several minutes of stillness
Wind is the enemy of outdoor macro photography. If a flower sways, raise the shutter speed, raise the ISO a little, or wait for a calm moment. Use a plant clamp when the stem will not stay still.
Smartphone Macro Photography
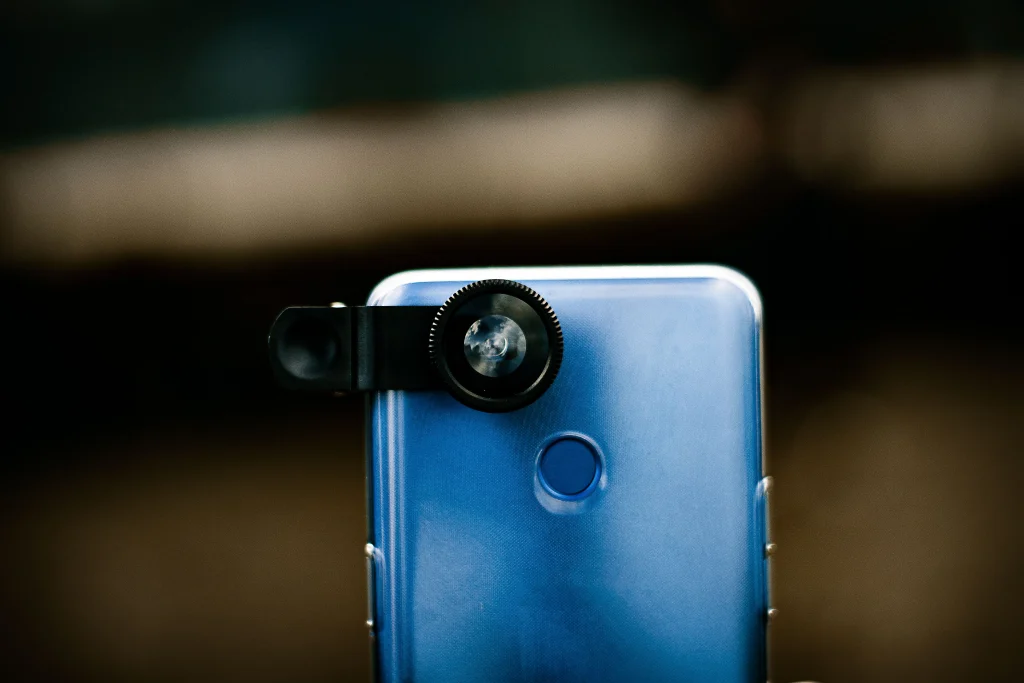
Many phones now have a macro mode or a close-focus lens. You can start macro photography with the phone you already own. Follow these steps:
- Wipe the lens, since smudges cause haze.
- Switch to macro mode, or use the main lens and move closer.
- Tap the screen to lock focus and exposure.
- Use natural light and skip the flash.
- Use a small tripod or rest the phone on a stable surface.
- Avoid digital zoom, since it cuts quality.
- Edit gently in a free app.
You can also buy a clip-on macro lens for a low price. It gives higher magnification, but it can soften the edges of the frame.
A Simple Workflow for Macro Photography
A set routine saves time and reduces mistakes:
- Choose the subject and look at it from several sides.
- Set up the tripod at the right height and angle.
- Place light and reflectors to soften shadows.
- Set your exposure and a safe aperture, such as f/8 to f/11.
- Focus manually on the most important part.
- Take a test shot and zoom in on the screen.
- Shoot a series, adjusting focus slightly each time.
- Review and back up your files.
Editing Macro Photography
Editing polishes close-ups, but it cannot rescue a blurry shot. Follow a simple order:
- Cull and pick the sharpest frames.
- Crop and straighten.
- Set white balance so colors look true.
- Adjust exposure, contrast, and shadows.
- Clean dust, lint, and stray marks.
- Blend focus stacks if you shot them.
- Sharpen the eye or main edge lightly.
- Export at the right size.
Keep colors natural. Over-saturated greens and oranges look fake and hide fine detail. Use masks to adjust only the parts that need it, such as the eye of an insect or the center of a flower.
Common Macro Photography Mistakes
Even experienced shooters slip up. Watch for these:
- Missed focus: Use live view zoom and check each frame.
- Camera shake: Use a tripod and a timer.
- Too wide an aperture: Close down a little for more depth.
- Too small an aperture: Stay below f/16 to avoid diffraction.
- Harsh light: Add a diffuser or shoot in shade.
- Cluttered background: Move to a cleaner angle.
- Chasing moving subjects: Wait for calm moments instead.
- Dirty subjects: Clean dust and lint before you shoot.
Most errors in macro photography come from rushing. Slow down and check every frame.
Troubleshooting Common Problems
Most problems in macro photography have simple fixes.
Photos look soft: Use a tripod, switch to manual focus, and check at 100 percent zoom.
Only a sliver is sharp: Close the aperture, move back a little, or use focus stacking.
Colors look dull: Add a reflector, shoot in softer light, and adjust white balance.
Highlights are blown out: Use a diffuser and lower the exposure.
The subject keeps moving: Raise the shutter speed, use a windbreak, or shoot at cooler times of day.
Dust spots appear: Clean your subject, your lens, and your sensor.
Macro Photography Checklist
Use this list before every shoot:
- Gear: Macro lens or close-up tool, tripod, remote, cloth
- Settings: f/8 to f/11, low ISO, RAW, manual focus
- Light: Soft, with a diffuser or reflector
- Subject: Clean and still
- Background: Simple and well separated
- Focus: On the eye or main edge
- Review: Zoom in on every test shot
Starter Settings for Macro Photography
| Situation | Aperture | ISO | Notes |
|---|---|---|---|
| Flower in shade | f/8 to f/11 | 100 to 200 | Use a tripod and windbreak |
| Insect, handheld | f/8 | 400 to 800 | Shutter speed 1/250 or faster |
| Water drop | f/11 | 100 to 200 | Light from behind |
| Jewelry | f/11 | 100 | Use focus stacking |
| Texture or fabric | f/8 | 100 to 200 | Keep the sensor parallel |
Treat these as starting points and adjust to the light you have.
Ethics and Safety in Macro Photography
Respect living subjects. Do not pull petals, trap insects, or chill them to slow them down. Do not move nests or damage plants to get a better angle. Stay on paths and avoid trampling habitat. Watch where you step, since small creatures hide at ground level.
Be careful with stinging insects and unknown plants. Wear sensible clothing, and keep a safe distance. Good macro photography never harms the subject. If a shot needs too much interference, skip it and find another.
Practice Ideas to Improve Macro Photography Fast
- Shoot the same flower in three kinds of light
- Spend one session using only one aperture
- Photograph ten textures from your home
- Build a focus stack of a coin or a feather
- Recreate a close-up you admire in your own style
- Review your photos weekly and note one thing to improve
Skill in macro photography grows with repeat practice. Small, steady sessions beat rare long ones.
Frequently Asked Questions
What is macro photography?
Macro photography is the practice of photographing small subjects at close range, so they appear life-size or larger. It reveals detail the eye usually misses, such as insect hairs, leaf veins, and water drops.
What is the best lens for macro photography?
A 90mm to 105mm macro lens is a strong choice for most shooters. It gives sharp detail and comfortable working distance. A 60mm macro lens is a lighter, cheaper option.
How do I start macro photography for beginners?
Start with a camera that has manual mode, a tripod, and a window with soft light. Practice on still subjects like flowers, coins, and fabric. Add extension tubes or close-up filters if you want more magnification on a budget.
What settings should I use for macro photography?
Try f/8 to f/11, ISO 100 to 400, manual focus, and RAW. Use a tripod and soft light, and adjust the aperture for the depth you need.
Can I do macro photography with a phone?
Yes. Use macro mode or move closer with the main lens, tap to set focus, shoot in natural light, and avoid digital zoom. A clip-on macro lens gives more magnification.
Do I need a tripod?
For sharp results, yes. At high magnification, every small movement shows. A tripod and a remote release keep your images crisp.
How do I stop insects from flying away?
Shoot on cool mornings when they are slow. Approach gently, avoid casting a shadow on them, and wait for calm moments.
Key Takeaways
- Light matters most. Use soft, even light and a reflector.
- Focus carefully, and consider focus stacking for full depth.
- Use a tripod and shoot in RAW.
- Choose clean backgrounds and simple compositions.
- Macro photography rewards patience, so slow down and practice often.
Conclusion
Macro photography for beginners is a skill anyone can learn. Choose the right lens or close-up tool, control the light, focus with care, and edit with a light hand. Each shoot teaches you something new about the tiny world around you.
Start your next macro photography session with the checklist above. Begin with a window, a flower, or a coin, and build from there. With time and practice, your close-ups will grow sharper, cleaner, and full of wonder.