
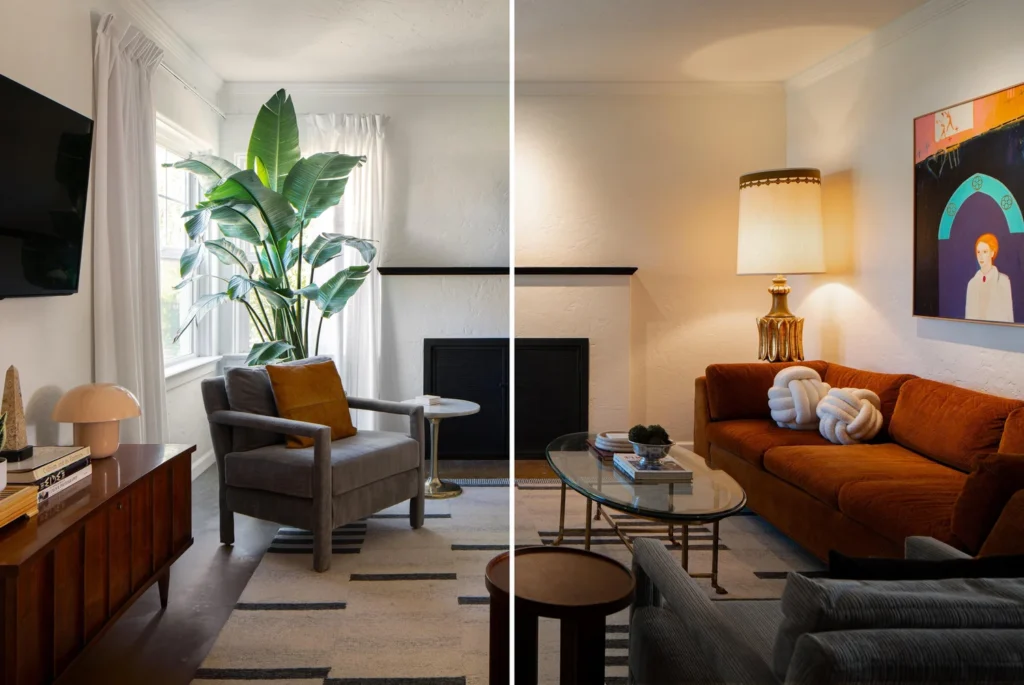
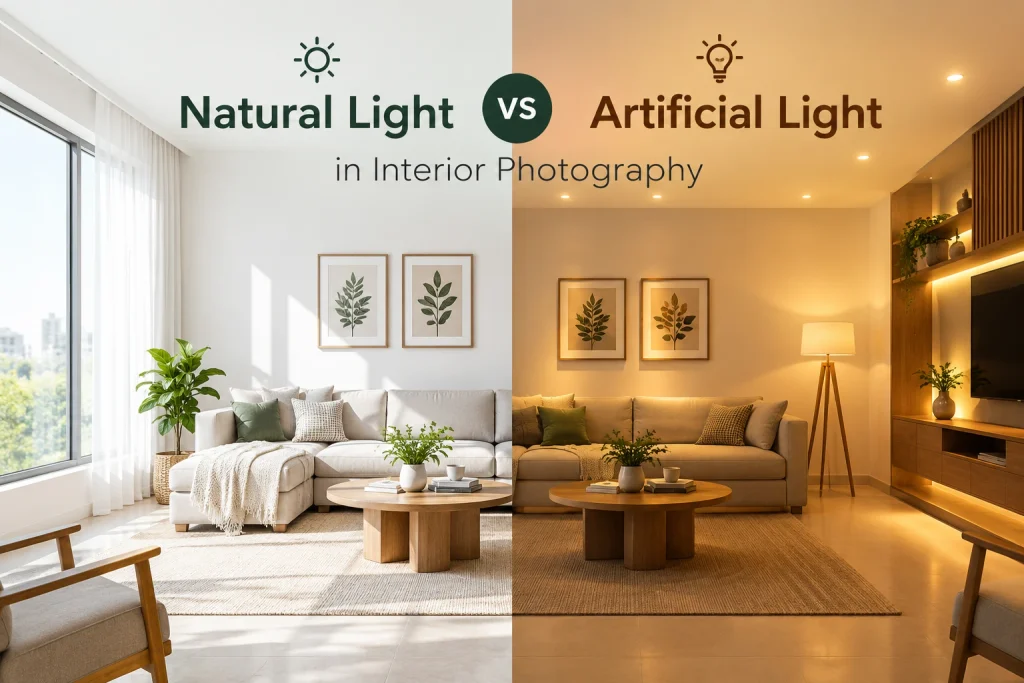
Natural Light vs Artificial Light in Interior Photography: The Complete Guide
Quick answer: Natural light vs artificial light in interior photography comes down to realism versus control. Daylight gives a warm, authentic look in bright rooms. Artificial light fills dark spaces and keeps results consistent. For most jobs, the best lighting for interior photography blends both, with a tripod, matched colour, and light editing.
A room can feel warm and spacious in person and look flat in a photo. The reason is almost always light. Your camera, lens, and styling matter, but light decides how a room feels on screen.
This guide explains natural light vs artificial light in interior photography in plain language. You will learn how each type of light behaves, when to use it, and how to blend them. You will also see which setup is the best lighting for interior photography in different rooms and property types. Every tip works with a pro camera or a phone.
What Is the Difference Between Natural and Artificial Light?
Natural light comes from the sun and sky. It enters a room through windows and doors, and it changes with the time of day, the weather, and the season.
Artificial light comes from sources you control, such as lamps, ceiling lights, LED panels, and flash. It stays steady, and you can move, dim, or tint it.
In short, natural light vs artificial light in interior photography is a choice between authenticity and control. Natural light looks real but shifts. Artificial light is steady but needs skill to look natural.
Why Light Matters in Interior Photography
Light shapes everything in a room photo. It decides how bright the room feels, how colours look, how deep the shadows fall, and whether textures show. Poor light makes a good room look small, dull, or dirty.
When you understand natural light vs artificial light in interior photography, you avoid common problems: dark corners, blown-out windows, orange walls, and flat images. You also work faster, because you know which tool to reach for.
Natural Light in Interior Photography
Advantages of Natural Light
- Realistic look: Colours and textures look the way people see them.
- Free: A window is often all you need.
- Mood: Morning light feels fresh. Evening light feels warm.
- Easy to learn: Beginners can study exposure and shadow without extra gear.
- Great for listings: Bright, airy rooms make buyers and guests feel welcome.
Limitations of Natural Light
- It changes: Clouds, seasons, and time of day shift the look within minutes.
- Contrast: Bright windows and dark rooms are hard to expose in one frame.
- Limited time: Good light may last only an hour or two.
- Dark rooms: Small windows, dark walls, and shaded sides leave dim corners.
- Harsh sun: Direct sun can cause hard shadows and bright patches.
These limits explain why natural light vs artificial light in interior photography is never a one-size-fits-all choice.
Artificial Light in Interior Photography
Advantages of Artificial Light
- Consistency: Results stay the same at any hour or in any weather.
- Control: You choose the direction, power, and softness.
- Reach: It brightens dark corners and deep rooms.
- Repeatability: You can recreate a setup across many rooms.
- Freedom: You can shoot at night or on a gloomy day.
Limitations of Artificial Light
- Colour casts: Bulbs can tint walls yellow, green, or orange.
- Skill needed: Poor placement causes harsh shadows and glare.
- Cost and gear: Flashes, stands, and modifiers add weight and expense.
- Setup time: Lighting takes longer than opening a curtain.
- Fake look: Too much light removes depth and mood.
Natural Light vs Artificial Light in Interior Photography: Side-by-Side Comparison
| Factor | Natural light | Artificial light |
|---|---|---|
| Look | Realistic and soft | Controlled, can look flat if overdone |
| Control | Low | High |
| Consistency | Changes all day | Steady |
| Cost | Free | Gear needed |
| Dark rooms | Struggles | Handles well |
| Colour | Cool to neutral | Warm, cool, or adjustable |
| Setup time | Short | Longer |
| Best for | Bright homes, lifestyle shots | Dark rooms, commercial work |
Use this table as a quick guide when you plan natural light vs artificial light in interior photography for a new shoot.
Best Lighting for Interior Photography: The Short Answer
The best lighting for interior photography is soft, even, and matched in colour. In most cases, that means daylight as the base and a small amount of artificial light to lift shadows. Daylight gives the room its natural feel. Flash or lamps fill what the window cannot reach.
There is no single answer to natural light vs artificial light in interior photography, but there is a best starting point. Start with natural light, then add artificial light only where the room needs it. If the room is very dark, build the look from artificial light and keep it soft. Whatever you use, keep colour consistent and the camera on a tripod.
Understanding Colour Temperature
Colour temperature describes how warm or cool light looks. It is measured in kelvin (K). Daylight is cool to neutral, around 5,000K to 6,500K. Warm bulbs sit around 2,700K to 3,000K. Cool white LEDs can reach 4,000K or more.
Mixed colour is the biggest headache in natural light vs artificial light in interior photography. When daylight and warm bulbs fall on the same wall, one side looks blue and the other orange.
Fix it in three ways:
- Switch off lamps that clash with daylight.
- Swap mismatched bulbs so all of them share one colour temperature.
- Use a colour gel on your flash to match the room.
Then set a custom white balance and shoot in RAW so you can fine-tune colour later.
Time of Day and Natural Light
Time of day changes natural light vs artificial light in interior photography more than most people expect. Early morning light is soft and cool. Midday light is strong and often harsh, especially through bare windows. Late afternoon light is warm and low, and it rakes across floors and walls to show texture.
Visit the room at different times and note when the light looks best. Take a test shot each time. Photographers who skip this step often end up using more artificial light than they need.
Window Direction
Window direction decides how much help a room needs. In the northern hemisphere, north-facing windows give soft, steady, indirect light. South-facing windows give strong, direct light that can be harsh. East-facing rooms glow in the morning. West-facing rooms glow in the late afternoon. In the southern hemisphere, north and south swap.
Your window direction also shapes natural light vs artificial light in interior photography for each project. A room with a soft north window may need almost no extra light. A west-facing room at midday may need diffusion or a different shooting time.
Weather and Seasons
Weather can flip natural light vs artificial light in interior photography in a single afternoon. Overcast skies act like a giant softbox and suit most interiors. Bright sun gives contrast and patterns but can overwhelm windows. Rain and heavy cloud make rooms dim, so artificial light may become necessary.
Seasons matter too. Winter days are short, and the sun sits low. Summer sun is high and strong. Plan around daylight hours, and keep a flash and a tripod in the bag as backup.
When to Choose Natural Light
When you weigh natural light vs artificial light in interior photography for a bright home, daylight is usually the winner. Choose it when:
- The room has large windows
- You want a warm, lived-in feel
- The shoot is for a home listing or a rental
- You have time to wait for good light
- The budget is small
Shoot when the sun is not blasting through the main window. Soft morning or late afternoon light often works best. Overcast days give even light that suits most rooms.
When to Choose Artificial Light
In dark rooms, natural light vs artificial light in interior photography tips the other way. Choose artificial light when:
- Windows are small or face a wall
- The shoot is at night or on a dark day
- You need the same look across many rooms
- The space is commercial, such as a shop or hotel
- Deadlines leave no room to wait for the sun
Keep the light soft. Bounce flash off a white ceiling or wall, or use a large diffuser. Never aim bare flash straight at the room.
Natural Light vs Artificial Light in Interior Photography by Room
Each room has its own light problems.
Living Rooms
Living rooms are usually the star of a listing. In living rooms, natural light vs artificial light in interior photography often favours daylight, since big windows and open space suit it. Turn off clashing lamps and keep sofas and cushions neat. Use bracketing if the windows are bright.
Kitchens
Kitchens show natural light vs artificial light in interior photography clearly, because they mix bright windows, under-cabinet lights, and shiny surfaces. Use daylight as the base. Switch off warm spotlights if they clash. Watch for reflections on taps, glass, and appliances.
Bedrooms
Bedrooms look best in soft, warm light. Natural light vs artificial light in interior photography in a bedroom often means daylight plus one or two matched bedside lamps. Make the bed neatly and keep lamps at the same height.
Bathrooms
Bathrooms have small windows and many reflective surfaces. Natural light vs artificial light in interior photography leans toward artificial light here. Use a bounced flash or a small LED panel, and stand in the doorway so you stay out of the mirror.
Dining Rooms
Dining areas look inviting with side light from a window. Add a soft fill from the side opposite the window if the table looks dark. A simple centrepiece adds life.
Home Offices and Small Rooms
Small spaces benefit from soft, even light. Shoot from a corner and avoid extreme wide angles. Add a bounced flash if daylight leaves one wall dark.
Natural Light vs Artificial Light in Interior Photography for Different Property Types
Homes for Sale
Buyers want bright, honest images. Natural light vs artificial light in interior photography for homes for sale usually favours daylight, with flash only where it is needed.
Short-Term Rentals
Guests want a cosy, welcoming feel. Daylight and a few matched lamps tell that story well.
Hotels and Restaurants
Hotels and restaurants raise the stakes for natural light vs artificial light in interior photography, since decorative lighting is part of the design. Keep their lights on if they define the mood, and balance colour in editing or with gels.
Offices and Retail Spaces
Commercial spaces often have mixed, harsh, or low light. Plan for artificial light and a tripod. Clear clutter and check reflections in glass.
Design Portfolios
Designers want the finished look to match their intent. Light should support texture, colour, and material, not change them.
The Flambient Technique for the Best Lighting for Interior Photography
Flambient blends flash and ambient light. You take one frame with only the existing light, then one or more frames with flash. You merge them in editing.
The ambient frame supplies warm, natural atmosphere and window detail. The flash frames supply clean colour and bright, even detail in dark areas. The result is a realistic, detailed room that a single exposure rarely gives.
Flambient settles the debate over natural light vs artificial light in interior photography for many photographers, since it uses both. It takes practice and careful editing, so learn the basics of each light first.
How to Shoot With Natural Light
Follow these steps when natural light vs artificial light in interior photography points you to daylight:
- Visit the room at different times and note when the light is best.
- Open curtains and clean the windows.
- Turn off lamps that clash with daylight.
- Set the camera on a tripod at chest height.
- Use f/8 to f/11 and a low ISO.
- Bracket three to five frames for bright windows.
- Check the screen for colour casts and blown highlights.
- Add a reflector or white board to lift dark corners.
How to Shoot With Artificial Light
Use these steps when natural light vs artificial light in interior photography points you to artificial light:
- Pick one main light source and switch off the rest.
- Match bulb colours, or use gels on your flash.
- Bounce flash off a white ceiling or wall.
- Keep the power low and add light in small steps.
- Place lights to avoid reflections on glass and floors.
- Take a test shot and check the shadows.
- Keep the final result close to how the room looks in person.
Gear for Natural Light vs Artificial Light in Interior Photography
You do not need a huge kit. Start simple and add tools as needs appear.
Entry level (natural light):
- Sturdy tripod
- Reflector or white foam board
- Wide lens between 16mm and 24mm
- Remote release or timer
Mid level (hybrid):
- Speedlight with a bounce card
- Light stand
- Wireless trigger
- Shoot-through umbrella or small softbox
Advanced (full control):
- Studio strobes or powerful LED panels
- Large modifiers
- Colour gels
- Colour checker card
Choose the best lighting for interior photography you can afford, and learn it well before you add more.
Camera Settings for Natural Light vs Artificial Light in Interior Photography
Start with these settings and adjust to the room:
| Situation | Aperture | ISO | Notes |
|---|---|---|---|
| Daylight interior | f/8 to f/11 | 100 to 200 | Bracket for bright windows |
| Dim room, daylight only | f/8 | 100 to 400 | Longer shutter on a tripod |
| Bounced flash | f/8 | 100 | Set shutter to balance ambient |
| Mixed light | f/8 | 100 to 200 | Custom white balance |
| Night interior | f/8 to f/11 | 100 to 400 | Matched bulbs, RAW |
Always shoot in RAW. It lets you fix white balance and recover shadows and highlights. A tripod keeps frames sharp and aligned.
Budget and Natural Light vs Artificial Light in Interior Photography
Budget shapes natural light vs artificial light in interior photography more than skill does at first. Daylight costs nothing, so beginners can start with a tripod and a window. Add a reflector, then a speedlight, then stands and modifiers as work grows. Spend on a sturdy tripod and a good wide lens before you buy extra lights.
Natural Light vs Artificial Light in Interior Photography for Beginners
Beginners should start with natural light vs artificial light in interior photography by mastering daylight first. Learn exposure, white balance, and bracketing in one well-lit room. Once you can make a window-lit room look good, add one speedlight and bounce it off the ceiling. Compare the two results side by side. This simple habit teaches you more than any gear upgrade.
Pro Tips
Pros treat natural light vs artificial light in interior photography as a toolbox, not a contest. They use daylight for atmosphere, flash for fill, and editing for polish. They also keep a gray card or colour checker in the first frame of every room, so colour stays accurate. Always finish each room with a quick review. Zoom in on windows, mirrors, and corners before you move on.
Common Mistakes in Natural Light vs Artificial Light in Interior Photography
- Mixing light colours: Match bulbs or turn lamps off.
- Blown-out windows: Bracket or use flash fill.
- Aiming flash straight at the room: Bounce it instead.
- Overlighting: Keep shadows and depth.
- Ignoring reflections: Check mirrors, glass, and glossy surfaces.
- Shooting at harsh midday: Wait for softer light.
- Skipping the tripod: Use one for every shot.
Most errors in natural light vs artificial light in interior photography come from rushing. Slow down and check each frame.
Troubleshooting Common Lighting Problems
Walls look orange: Warm bulbs are mixing with daylight. Switch them off or match them.
Windows are pure white: Bracket exposures or add flash fill.
Corners look dark: Add a bounced flash or reflector.
Photos look flat: Reduce artificial light and let side light return.
Glare on surfaces: Change the light angle and diffuse it.
Colours differ across the room: Use one white balance for the main area and adjust local areas in editing.
Natural Light vs Artificial Light in Interior Photography With a Phone
Phones can handle both. Phones deal with natural light vs artificial light in interior photography best when you keep things simple:
- Wipe the lens.
- Turn on the grid and keep the phone level.
- Tap the darker part of the room to lift exposure, then lower highlights.
- Use HDR for bright windows.
- Skip the built-in flash.
- Use lamps matched in colour, or a small LED panel.
- Edit gently in a free app.
Editing for Natural Light vs Artificial Light in Interior Photography
Editing finishes the job, but it cannot fix poor light. Follow this order:
- Straighten lines and crop.
- Set white balance.
- Lift shadows and lower highlights.
- Blend bracketed or flambient frames.
- Correct local colour casts with masks.
- Remove small flaws.
- Sharpen lightly and export.
Keep it natural. If the photo does not look like the room in person, you have gone too far.
Natural Light vs Artificial Light in Interior Photography Checklist
- Plan: Check window direction and the best time of day
- Light: Choose one main source and match colours
- Gear: Tripod, wide lens, reflector, flash if needed
- Settings: f/8, low ISO, RAW, bracketing
- Room: Tidy, no reflections, lamps set
- Review: Check colour, windows, and shadows
- Edit: Natural tones, straight lines, no heavy effects
Practice Ideas
- Shoot the same room at morning, noon, and evening
- Compare natural light vs artificial light in interior photography by shooting one room twice
- Try one flambient shot
- Match all bulbs in one room and compare
- Ask a friend to rate your photos honestly
Frequently Asked Questions
What is the difference between natural light vs artificial light in interior photography?
Natural light vs artificial light in interior photography differs mainly in control. Natural light is free, realistic, and changeable. Artificial light is steady and adjustable, but it needs skill to look natural.
Which is better for interior photography, natural or artificial light?
Neither wins every time. The answer depends on the room. Use daylight for bright spaces and artificial light for dark ones. Many photographers use both, and the mix is often the best lighting for interior photography.
Is natural light vs artificial light in interior photography different for real estate?
For real estate, natural light vs artificial light in interior photography leans toward daylight with flash fill. Buyers want bright, honest images, so avoid heavy effects and keep colours true.
How do I decide between natural light vs artificial light in interior photography?
Check the window size, the time of day, and the room’s wall colour first. Then decide natural light vs artificial light in interior photography by asking whether daylight alone gives a balanced exposure. If it does, stay with daylight. If not, add soft artificial light.
What is the best lighting for interior photography?
The best lighting for interior photography is soft, even, and colour-matched. Daylight with a touch of bounced flash covers most rooms.
Can I mix natural and artificial light?
Yes, but match the colour. Switch off clashing lamps, use gels, or try the flambient technique.
Do I need a flash for interior photography?
Not always. A tripod, bracketing, and good timing cover many rooms. A flash helps when rooms are dark or contrast is high.
How do I fix orange walls?
Turn off warm bulbs, match colours, set a custom white balance, and correct local colour in editing.
Key Takeaways
- Natural light vs artificial light in interior photography is about realism versus control.
- Daylight suits bright rooms. Artificial light suits dark ones.
- Match colour temperature and avoid mixed light.
- Use a tripod and shoot in RAW.
- Blend both with flambient when a room needs it.
- Start with daylight, add artificial light where needed, and revisit natural light vs artificial light in interior photography on every new job.
Conclusion
Neither light source wins every time. Natural light gives realism and warmth. Artificial light gives control and consistency. Mastering natural light vs artificial light in interior photography helps you choose the right approach for each room, client, and budget.
Start with the checklist on your next shoot. Learn natural light vs artificial light in interior photography one step at a time, and your photos will look brighter, truer, and more professional.
Pingback: Best Macro Photography for Beginners: Complete Guide in 2026
Pingback: best Product Photography Techniques: Complete Guide 2026