
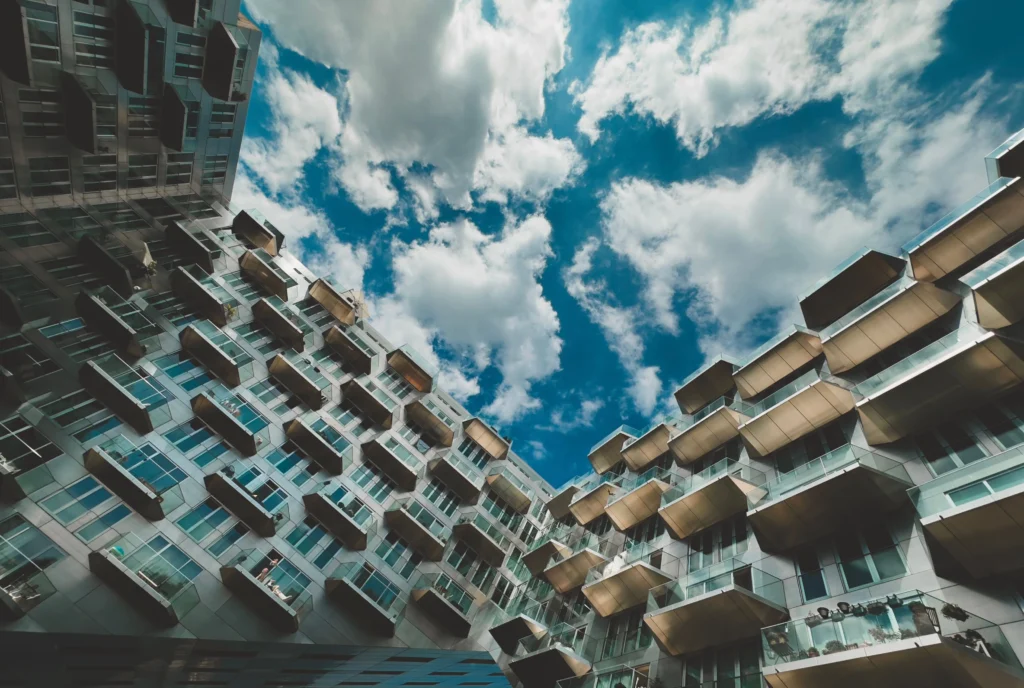
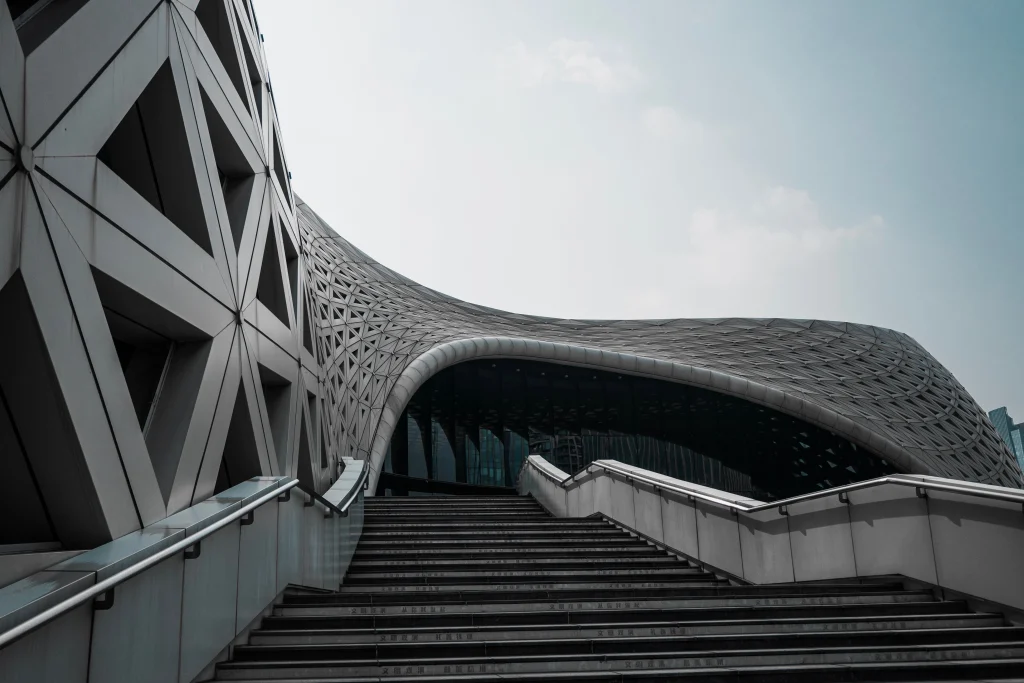
Quick answer: Architectural photography is the art of capturing buildings and structures so their design, scale, and character come through. The best architectural photography tips are to keep vertical lines straight, shoot in soft or golden light, use a wide or tilt-shift lens, and plan your angles before you arrive.
A building can be a masterpiece and still look flat in a bad photo. Good architectural photography fixes that. It turns glass, steel, brick, and concrete into images that feel alive.
This guide covers architectural photography from gear and settings to light, composition, editing, and business. Every one of these architectural photography tips works with a pro camera or a good phone. Read it through once, then use the checklist on your next shoot.
What Is Architectural Photography?
Architectural photography is the craft of photographing buildings, interiors, and built spaces in a way that shows the vision behind the design. It is part art and part technical skill. You need a good eye for form and light, and you need control of lines, perspective, and exposure.
It differs from casual snapshots. A tourist photo says, “I was here.” A professional image says, “This is how the space works and why it matters.”
Most architectural photography falls into these types:
- Exterior: Facades, rooflines, and the building in its setting
- Interior: Lobbies, living rooms, offices, and public spaces
- Detail: Textures, joints, stairs, and materials
- Aerial: Drone views that show layout and context
- Urban: Skylines, streets, and groups of buildings
- Historic: Records of heritage sites and older structures
Why Architectural Photography Matters
Photos are how most people first meet a building. Clients judge a designer by the portfolio. Buyers judge a property by the listing. Magazines judge a project by the images sent to them.
Strong architectural photography helps designers win work, get published, and enter awards. It also preserves buildings as records of their time. A well-made image can outlast the furniture, lighting, and landscaping of the day.
If you apply the architectural photography tips in this guide, you will make images that show a building at its best. You will also stand out in a crowded field, because many people skip the basics of light and line.
Essential Gear for Architectural Photography
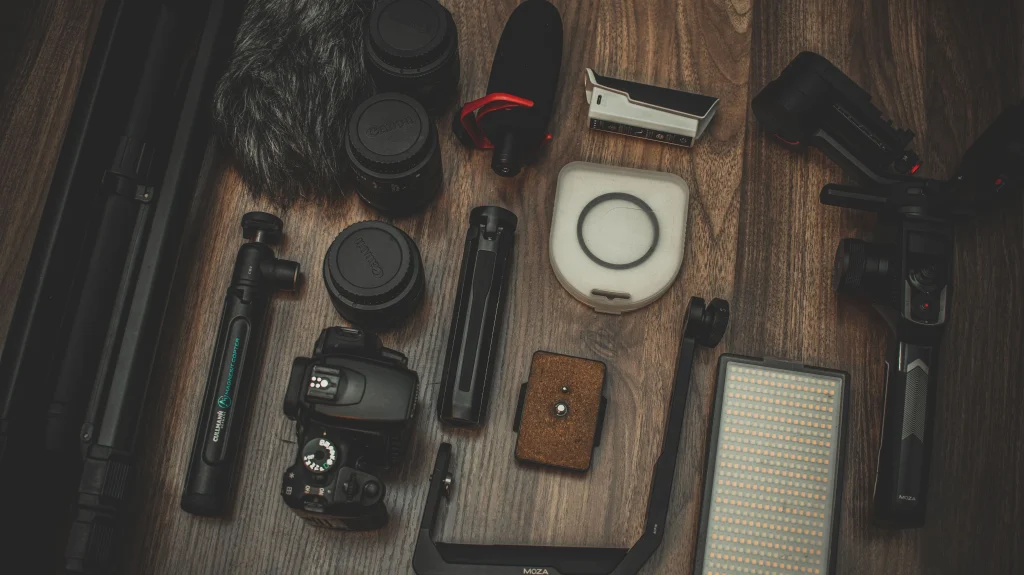
You do not need a huge kit. You need the right tools and the skill to use them.
1. A Capable Camera
Any modern camera can handle architectural photography. Higher resolution helps, since buildings are full of fine detail and clients may print large. A full-frame mirrorless or DSLR camera gives you better dynamic range for bright skies and dark interiors. Many phones now do well too.
2. The Right Lenses
Lens choice matters more than the camera body. A tilt-shift lens is the classic tool for architectural photography, because it lets you correct perspective in the camera. Common focal lengths are 17mm, 24mm, and 45mm.
A wide zoom, such as a 16-35mm, is a flexible and cheaper option. Add a 70-200mm lens to compress distant buildings and pick out details high on a facade.
3. A Sturdy Tripod
Among all architectural photography tips, using a tripod may be the simplest. It keeps your frame level, your lines straight, and your images sharp during long exposures. Choose a tripod that stays solid in wind and is tall enough to reach eye level. A geared head lets you make tiny adjustments.
4. Filters
A circular polarizer cuts glare on glass and deepens blue skies. A neutral density filter allows long exposures that smooth clouds and water. Use both sparingly, and check how they affect color.
5. Small Accessories
A remote release or timer prevents shake. A hot-shoe spirit level helps you keep the camera straight. A lens cloth, extra batteries, and a rain cover can save a shoot. Small tools make architectural photography easier and more reliable.
Camera Settings: Architectural Photography Tips for Sharp Images
Start with these settings, then adjust to the scene:
- Mode: Aperture priority or manual
- Aperture: f/8 to f/11 for sharp detail from front to back
- ISO: 100 or the lowest native setting
- Shutter speed: Whatever the exposure needs, since you are on a tripod
- Focus: Manual or single-point, with live view zoom for accuracy
- White balance: Set it manually, or fix it later in RAW
- File format: RAW, always
These architectural photography tips on settings protect you from blur, noise, and color problems. Avoid very small apertures like f/22. They add diffraction, which softens fine detail. For deep scenes, focus about one-third of the way into the frame, or use focus stacking.
Use bracketing when the scene has bright windows or skies and dark shadows. Take three to five frames at different exposures and blend them later. A tripod keeps every frame aligned.
Light: Architectural Photography Tips for Beautiful Results
Light decides how a building looks. The same facade can feel cold at noon and warm at sunset.
Golden Hour
The hour after sunrise and before sunset gives low, warm light. It brings out texture and shape. Golden hour is a favorite in architectural photography because it adds depth and color. Side light shows brick, stone, and wood grain clearly.
Blue Hour
Just after sunset, the sky turns a deep blue while the building lights glow. This balance is a classic look in architectural photography. The window is short, often 20 to 30 minutes, so arrive early and be ready.
Overcast Days
Cloud cover acts as a giant softbox. It reduces harsh shadows and suits detail shots and interiors. The sky can look dull, so frame it out or replace it with care in editing.
Midday Sun
Hard overhead light creates strong shadows and washed-out colors. Avoid it when you can. If you must shoot at noon, focus on details, shaded areas, or black and white.
Plan With Tools
Use a sun-path app to see where the sun will rise and set relative to the building. Check the weather and keep a backup day free. A little planning saves hours of waiting.
Composition: Architectural Photography Tips for Strong Images
Good composition turns a record into a work of art.
Keep Lines Straight
Vertical lines should stay vertical. Tilted walls make a building look like it is falling over. Level the camera, turn on the grid on your screen, and fix small errors later. Great architectural photography begins with clean, honest lines.
Use Symmetry and Balance
Many buildings are designed with symmetry in mind. Stand in the center and keep the camera level to show it. When the design is asymmetric, balance the frame with space, shadow, or a neighboring element.
Find Leading Lines
Roads, stairs, railings, and rooflines guide the eye. Use them to lead the viewer into the frame and toward the main subject.
Frame the Subject
Use arches, trees, or doorways to frame the building. Framing adds depth and focuses attention.
Show Scale With People
A small figure in the frame shows how big a building is. Keep people simple and unposed. A person walking through a lobby adds life without stealing the show.
Mind the Edges
Check all four corners before you shoot. Cars, signs, poles, and wires can ruin a clean frame. Move a step to one side and the problem often goes away.
These architectural photography tips on composition help you build images with purpose. Take time to walk around the building and try different angles before you set up the tripod.
Fixing Perspective Distortion in Architectural Photography
Pointing the camera up to fit a tall building makes the vertical lines lean inward. This is called perspective distortion, and it is a classic problem in architectural photography.
There are three main fixes:
- Use a tilt-shift lens. Shift the lens up instead of tilting the camera. Lines stay parallel.
- Back up and crop. Stand farther away, keep the camera level, and crop the extra foreground later. This works best with a high-resolution sensor.
- Correct in editing. Use the perspective or transform tools in your editing software. Keep corrections modest so the image does not stretch.
Pick the first option when you can, and use the others as backups.
Plan Your Shoot Before You Arrive
The best images are often decided before you lift the camera. A short plan makes the day smoother.
- Scout the site: Visit once in advance, or study maps and street views. Note the best angles and the time the light hits each side.
- Write a shot list: List the main views, interior rooms, and details you need. Tick them off as you go.
- Get permission: Ask the owner or manager for access, and confirm any rules about tripods or drones.
- Check the weather: Clear skies are not always best. Soft clouds, fog, and even light rain can add mood.
- Pack smart: Charge batteries, clear your cards, and bring a level, cloth, and spare gear.
- Arrive early: Light changes fast. Being ready ten minutes early beats being late by one.
Interior Architectural Photography
Interiors are tricky. Rooms are tight, light is mixed, and windows are often far brighter than walls. Follow these steps:
- Turn off mixed lights, or make sure the bulbs share one color
- Bracket exposures to hold detail in the windows
- Keep the camera at chest height and level
- Straighten cushions, clear clutter, and hide cables
- Use a wide lens, but avoid stretching the edges of the frame
Interior architectural photography also rewards a patient pace. Walk through each space, find the best corner, and wait for the right light. For more on room shots, see our guide to interior photography mistakes (add internal link here).
Exterior Architectural Photography Tips
Outdoor shoots depend on position, timing, and a clean frame. These tips help you control all three:
- Shoot from across the street, using a longer lens, to reduce distortion
- Watch reflections on glass and take a few frames from different angles
- Photograph all four sides, plus the entrance and key details
- Include some context, such as landscaping, paths, and neighboring buildings
- Remove parked cars, bins, and temporary signs if you can
Exterior architectural photography is as much about the setting as the structure. A building that sits well in its surroundings looks better in the frame.
Night Architectural Photography
After dark, buildings glow with a new kind of drama. Use a tripod, ISO 100 to 400, and an aperture around f/8. Exposures may last from two to thirty seconds. Moving cars create light trails that add energy. Set a custom white balance, since mixed city lights can confuse auto settings. Check your highlights, because bright lamps can burn out. Shoot in RAW so you can balance the tones afterward.
Drone and Aerial Architectural Photography
Drones give you a fresh view of a site. Aerial shots show layout, roofs, and how a building meets its surroundings. Follow your local laws, get any required licenses, and ask the owner for permission. Avoid crowds, airports, and restricted zones. Fly at golden hour for soft light, and keep the camera level to avoid skewed lines. Drone architectural photography works best when it adds information that ground-level shots cannot show.
How to Shoot Different Building Styles
Each style calls for a slightly different approach.
Modern glass buildings: Use a polarizer to control reflections. Overcast skies and blue hour work well. Look for curves, repeating patterns, and clean lines.
Historic buildings: Use side light to bring out carvings and stone. Avoid extreme wide angles, which distort old facades. Capture small details, such as doors, windows, and ornaments.
Concrete and brutalist structures: Strong shadows and dramatic skies suit these bold forms. Black and white often works well.
Homes and residential projects: Warm light and landscaping create a welcoming mood. A twilight shot with the lights on is a favorite for listings.
Industrial spaces: Focus on scale, geometry, and texture. Wear safety gear and follow site rules.
Places of worship: Light is often low, so use a tripod. Be quiet, respectful, and ask permission first.
Details and Abstract Shots
Not every frame needs to show the whole building. Detail shots tell the story of materials and craft. Look for repeating patterns in windows, stair rails, tiles, and ceiling beams. Use a longer lens to isolate small areas. Shoot straight on for clean geometry. Keep the composition minimal, and let one strong shape or texture carry the image. A set of detail shots makes a project feel complete.
Weather and Seasons
Do not wait only for blue skies. Fog adds mystery. Rain creates reflections on streets and plazas. Snow simplifies the scene and softens hard edges. Summer gives green landscaping, while autumn adds warm color. Check the forecast and decide what mood suits the building. Pack a rain cover and a microfiber cloth for wet days.
Architectural Photography Tips for Beginners
New to this field? Start with these simple steps:
- Pick one building near you and visit it at different times of day.
- Use a tripod, even for quick shots.
- Keep the camera level and check the grid.
- Shoot in RAW and bracket tricky scenes.
- Study the work of photographers you admire.
- Edit gently and learn the perspective tools.
- Share your work and ask for honest feedback.
The best architectural photography tips for beginners are simple: slow down, control the light, and keep your lines straight. Skill grows with practice, not gear.
Architectural Photography Tips for Smartphone Users
Phones can capture strong building photos when you use them well:
- Clean the lens before you shoot.
- Turn on the grid and keep the phone level.
- Tap to set focus and lower the exposure if the sky is too bright.
- Use HDR mode for scenes with bright windows.
- Avoid digital zoom, and walk closer instead.
- Use a small tripod or rest the phone on a stable surface.
- Fix lines and color gently in a free editing app.
Editing Architectural Photography
Editing is a big part of professional work. Follow a simple order to stay consistent:
- Import and cull: Pick the sharpest, best-composed frames.
- Lens corrections: Remove distortion and vignetting.
- Perspective: Straighten verticals and horizons.
- Exposure: Blend bracketed frames or lift shadows and lower highlights.
- Color: Set white balance so whites look clean and materials look true.
- Clean up: Remove stray cables, litter, and small marks.
- Sharpen and export: Sharpen lightly and export at the right size.
Editing is where good architectural photography becomes great. Keep it natural, though. Over-saturated colors and heavy HDR look fake, and clients can tell.
Common Architectural Photography Mistakes
Even experienced shooters slip up. Watch for these:
- Leaning verticals: Keep the camera level or correct them.
- Harsh midday light: Shoot at better times, or focus on details.
- Clutter: Remove cars, signs, and trash from the frame.
- Too wide a lens: Avoid stretching edges and warping lines.
- Over-editing: Keep colors and tones believable.
- No permission: Always ask before shooting on private property.
- Ignoring context: Show how the building fits its setting.
Most of the mistakes in architectural photography come from rushing. Slow down, check your frame, and take extra shots.
Architectural Photography Checklist
Use this list before every shoot:
- Plan: Scout, shot list, permission, weather check
- Gear: Tripod, wide or tilt-shift lens, filters, level, charged batteries
- Settings: f/8 to f/11, low ISO, RAW, bracketing if needed
- Light: Golden hour, blue hour, or soft overcast
- Frame: Level camera, straight lines, clean edges
- Coverage: Wide views, medium views, and close details
- Edit: Perspective fixed, color accurate, no heavy effects
Starter Camera Settings for Buildings
| Situation | Aperture | ISO | Shutter speed |
|---|---|---|---|
| Daytime exterior | f/8 to f/11 | 100 | Set by exposure, on a tripod |
| Interior | f/8 | 100 to 200 | Often 1 to 10 seconds |
| Blue hour | f/8 to f/11 | 100 to 200 | 2 to 15 seconds |
| Night with light trails | f/8 | 100 to 400 | 10 to 30 seconds |
| Detail shot | f/5.6 to f/8 | 100 to 400 | 1/125 or as needed |
Treat these as starting points, and adjust for the scene and the light you have.
Building a Career in Architectural Photography
Many people turn this skill into a business. The work can be steady and rewarding, but it takes planning.
Clients hire architectural photography specialists for several reasons: to win projects, sell properties, enter awards, and promote their brands. Typical clients include architects, interior designers, builders, developers, real estate firms, and hotels.
To get started, build a focused portfolio of 15 to 25 strong images. Show a range of building types and light conditions. Offer to photograph a local project at a reduced rate, and ask for a testimonial. Learn to quote clearly. Price by project, and spell out usage rights, delivery time, and number of images.
Network with local architects and designers. Share your work on a simple website and on social platforms where designers spend time. Always deliver on time, communicate well, and be flexible. These architectural photography tips for business help you turn happy clients into repeat clients.
Permissions and Etiquette
Rules vary by country and by site. Public buildings are often easy to shoot from the street, but private property, interiors, and some landmarks have limits. Ask before you enter or fly a drone. Respect residents’ privacy and avoid showing faces or license plates. Carry a simple release or permission note for commercial jobs. Good manners open doors and protect your reputation.
Practice Ideas to Improve Fast
- Photograph one building in three kinds of light
- Shoot only with one focal length for a week
- Recreate a famous building photo in your own style
- Make a set of ten detail shots from a single site
- Edit the same image three ways, then pick the most natural look
Frequently Asked Questions
What is architectural photography?
Architectural photography is the practice of photographing buildings, interiors, and built spaces to show their design, form, and atmosphere. It is used by architects, designers, developers, and publishers.
What lens is best for buildings?
A tilt-shift lens is the best choice because it corrects perspective without tilting the camera. A wide zoom between 16mm and 35mm is a flexible, affordable alternative.
What are the best architectural photography tips for beginners?
Use a tripod, keep the camera level, shoot in soft or golden light, and focus on clean lines. Shoot in RAW and edit lightly.
What time of day is best for shooting buildings?
Golden hour and blue hour give the most flattering light. Overcast days also work well for soft, even results.
What camera settings should I use?
Start with f/8 to f/11, ISO 100, and RAW. Use a tripod and let shutter speed adjust to the light.
Can I shoot buildings with a phone?
Yes. Keep the phone level, use the grid, avoid digital zoom, and shoot in good light. Edit gently afterward.
Do I need permission to photograph a building?
Often yes for private property, interiors, and drone work. Always ask first and check local rules.
Key Takeaways
- Light matters most. Choose golden hour, blue hour, or soft overcast.
- Keep verticals straight with a level camera or a tilt-shift lens.
- Plan the shoot, scout the site, and arrive early.
- Edit naturally and avoid heavy effects.
- Apply these architectural photography tips one at a time, and practice often.
Conclusion
Great building photos come from patience, planning, and a sharp eye. Choose the right lens, find the best light, keep your lines straight, and edit with a light hand. Each shoot teaches you something new.
Architectural photography rewards those who slow down and look closely. Start your next architectural photography project with the checklist above, and you will see your images grow more confident, clean, and professional.