
Introduction
Photographing a small room can be challenging, especially when the space has limited natural light, large furniture, narrow walls, and restricted camera angles. A room that looks comfortable in person may appear cramped and dark in photographs. However, the right photography techniques can change how people see a space.
Interior photography is not simply about taking pictures of furniture and walls. It is about using light, perspective, composition, and camera settings to present a room in the best possible way. Even a small bedroom or compact apartment can look bright, open, and attractive when photographed correctly.
Learning Small Room Photography Tips can help you capture better interior photographs without changing the actual size of the room. Simple adjustments, such as moving furniture, opening curtains, choosing a suitable lens, and photographing from the right corner, can create a noticeable difference.
Many professional interior photographers use these techniques when photographing apartments, hotels, residential properties, and interior design projects. These methods are also useful for homeowners who want attractive photographs for social media or property listings.
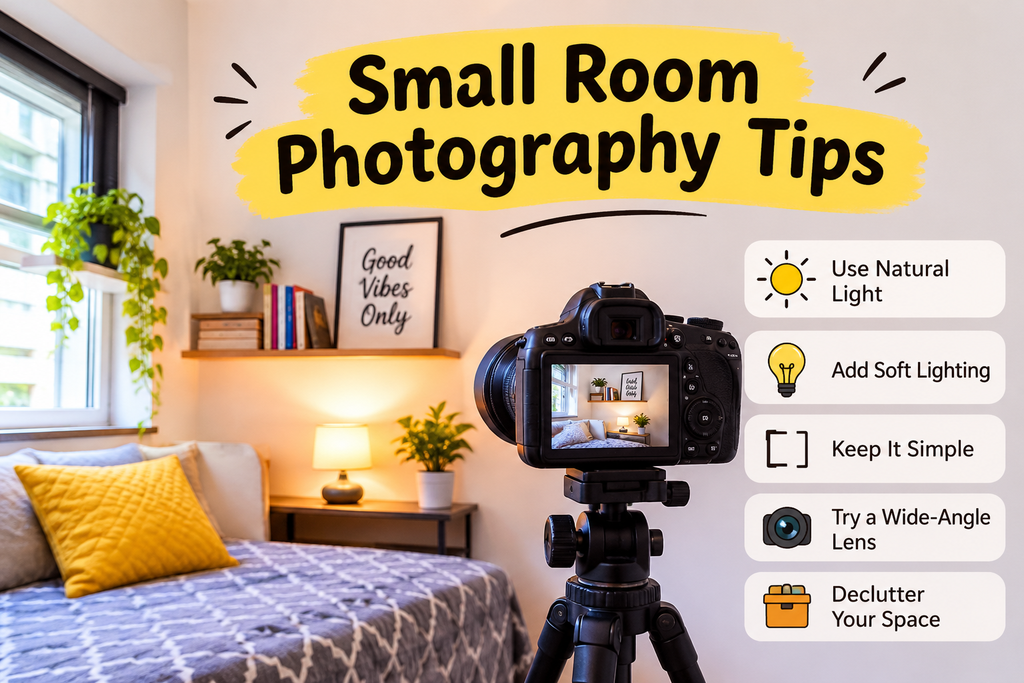
In this guide, we will explore practical Small Room Photography Tips that can help you make compact spaces look bigger. We will discuss camera angles, lighting, lenses, composition, editing, and equipment. You will also discover useful Small bedroom photography ideas for capturing bedrooms, apartments, and other small interiors.
Whether you are a beginner or a professional photographer, these techniques will help you create attractive and realistic interior photographs.
1. Prepare the Room Before Taking Photographs
Room preparation is the first step towards successful interior photography. Even an expensive camera cannot make a cluttered room look attractive. Before taking pictures, organize the space and remove objects that distract viewers.
One of the most effective Small Room Photography Tips is to create a clean and organized environment. A tidy room allows the viewer to focus on its design, furniture, and available space.
Remove Unnecessary Furniture
Look around the room and identify furniture that is not essential to the composition. Extra chairs, unused tables, storage boxes, and decorative objects can make a small room appear crowded.
You do not need to remove every item. Keep important furniture and a few attractive accessories. The goal is to create a balanced interior that looks natural.
Organize the Furniture
Arrange furniture carefully before shooting.
- Make the bed neatly and arrange the pillows.
- Straighten sofas and cushions.
- Remove objects from tables.
- Hide visible cables and chargers.
- Organize books and decorative items.
- Keep walking areas clear.
These simple Small bedroom photography ideas help create a clean and welcoming appearance.
Keep the Floor Visible
Visible floor space can make a room appear more open. Avoid placing unnecessary furniture in walking areas. Try to create a clear path between the entrance and the main furniture.
When using Small Room Photography Tips, remember that the purpose is to show the available space clearly rather than fill the photograph with too many objects.
2. Choose the Right Wide-Angle Lens
2. Choose the Right Wide-Angle Lens for Small Room Photography
Choosing the right camera lens is one of the most important Small Room Photography Tips for capturing compact interiors. A standard camera lens may not capture the entire room, especially when you have limited space to move backwards. A wide-angle lens solves this problem by allowing you to include more of the interior in a single photograph.
Wide-angle lenses are particularly useful when photographing small bedrooms, narrow living rooms, studio apartments, and compact home interiors. They help create a wider field of view and make it easier to show the room’s layout.
Use a Wide-Angle Lens
A wide-angle lens is a useful tool for interior photographers who want to capture more space without moving too far away from the subject.
For full-frame cameras, a focal length between 16mm and 24mm is a good starting point. These Small Room Photography Tips can help you capture attractive interior photographs while maintaining a natural appearance.
A wide-angle lens offers several advantages:
- Captures more of the room in one photograph.
- Shows multiple walls and furniture together.
- Includes windows, doors, and decorative elements.
- Creates a stronger sense of depth.
- Makes narrow spaces easier to photograph.
- Helps capture the overall room layout.
When applying these Small Room Photography Tips, choose your shooting position carefully. A good lens works best when combined with proper camera placement and balanced composition.
Avoid Excessive Wide-Angle Distortion
Although wide-angle lenses are useful, using an extremely wide focal length can create unwanted distortion. Furniture close to the camera may appear larger than it really is, while objects near the edges can look stretched.
For example, when photographing a small bedroom, a bed placed too close to the camera may dominate the entire frame. This can make the surrounding furniture and walls appear smaller.
One of the most practical Small Room Photography Tips is to choose a focal length that captures enough of the interior without changing its natural proportions.
Keep important furniture away from the extreme edges of the frame whenever possible. Also, avoid standing too close to large objects unless you want to create a specific visual effect.
Consider Using a Tilt-Shift Lens
A tilt-shift lens is another useful option for professional interior photography. It allows photographers to control perspective and maintain straight vertical architectural lines.
This lens is particularly helpful when photographing tall wardrobes, narrow rooms, large windows, and interiors with high ceilings.
For example, when photographing a bedroom, you want the wardrobe, doors, and walls to appear straight rather than leaning towards the centre of the image.
These Small Room Photography Tips can help you create clean and professional-looking photographs.
However, beginners do not need to purchase an expensive tilt-shift lens immediately. A standard wide-angle lens, a stable tripod, and careful camera positioning are enough to achieve excellent results.
Choose the Right Lens for Your Room
Before selecting a lens, consider the size of the room, available shooting distance, and type of furniture. Experiment with different focal lengths and compare the results.
Remember, the goal of Small Room Photography Tips is not simply to capture the largest possible area. It is to present the room in a realistic, balanced, and attractive way.
The best interior photographs show the available space clearly while keeping furniture, walls, and architectural features looking natural.
3. Find the Best Camera Position and Shooting Angle
Camera position plays an important role in making a small room look larger in photographs. The right shooting angle can reveal more of the room, create depth, and make the layout easier to understand. Choosing the best position is one of the most effective Small Room Photography Tips for beginners.
Instead of standing directly in front of a bed, sofa, or cupboard, try moving towards a corner. This allows you to capture multiple walls and more of the room in a single frame.
Find the Best Corner
Walk around the room and test different camera positions before taking photographs. Look for a corner that gives you a clear view of the main furniture, windows, doors, and important design features.
Avoid shooting from positions where large furniture blocks the view or makes the room appear crowded. A carefully selected corner can make Small Room Photography Tips more effective by showing the available space clearly.
Use Diagonal Composition
Diagonal composition helps create a stronger sense of depth. Rather than photographing a bed straight from the front, move slightly to one side and capture it at an angle.
This technique allows viewers to see more of the furniture and understand how different elements are arranged. It is particularly useful when applying Small Room Photography Tips in compact bedrooms, narrow living rooms, and small apartments.
Experiment with Different Camera Positions
Do not depend on just one shooting angle. Take several photographs from different corners and compare how each image presents the room.
Try shooting from near the doorway, beside a window, or from the farthest available corner. Choose the position that shows the room naturally without making furniture look distorted.
These Small bedroom photography ideas are especially useful when photographing compact bedrooms with limited walking space. Practising different angles is one of the simplest Small Room Photography Tips for creating balanced, spacious-looking interior photographs.
4. Use the Correct Camera Height
Camera height affects how walls, floors, ceilings, and furniture appear.
If the camera is too high, the floor may dominate the photograph. If it is too low, furniture can appear unusually large.
A camera position around chest height is a useful starting point for many interior photographs. However, the ideal height depends on the furniture and room layout.
Keep the Camera Level
Keep the camera straight instead of pointing it sharply upwards or downwards.
This helps maintain vertical lines and reduces perspective distortion.
A tripod with a built-in spirit level can make this easier.
Avoid Unnecessary Tilting
When the camera is tilted, walls and doors may appear to lean towards the centre of the photograph.
This can make the room look distorted.
Use a level camera position and correct minor perspective problems during editing.
Following these Small Room Photography Tips can help you create professional-looking photographs with natural proportions.
5. Make the Most of Natural Light
Lighting is one of the most important elements of interior photography. A poorly lit room can appear dark, cramped, and less inviting, while a well-lit room often feels more spacious and comfortable. Using natural light effectively is one of the essential Small Room Photography Tips for capturing attractive interior photographs.
Natural daylight creates soft illumination, highlights interior details, and helps maintain realistic colours. You can improve your photographs by making a few simple adjustments before taking pictures.
Open Windows and Curtains
Before photographing the room, open the curtains and blinds to allow as much natural daylight as possible to enter. This helps brighten dark corners and makes the room feel more open.
Windows can also become attractive elements in your composition. However, avoid overexposing them. Adjust your camera settings to retain visible details outside while keeping the interior properly exposed.
For beginners, this is one of the easiest Small Room Photography Tips because it improves lighting without requiring expensive equipment.
Photograph at the Right Time
Natural light changes throughout the day, so choosing the right shooting time can make a noticeable difference.
Early morning and late afternoon often provide soft, attractive light. However, the best time depends on the direction your windows face and whether nearby buildings block sunlight.
Observe how daylight enters the room before choosing your shooting time. Take a few test photographs to find the most balanced lighting.
Avoid Harsh Sunlight
Direct sunlight can create strong shadows, bright patches, and uneven exposure on furniture and walls. These distractions can make a small room look visually busy.
If sunlight is too strong, use translucent curtains to soften it. You can also photograph when the sunlight is less intense to achieve more even illumination.
Applying these Small Room Photography Tips will help you capture natural-looking interiors with balanced brightness. Remember that good lighting should reveal the room’s details without making the image look artificially bright. With practice, these Small Room Photography Tips can help you create cleaner, brighter, and more inviting photographs of compact spaces.
Combine Natural and Artificial Lighting
Sometimes natural light is not enough.
You can use existing room lights or an external flash to brighten darker areas.
Try to maintain consistent colour temperatures. Mixing cool daylight with very warm yellow bulbs can produce unwanted colour casts.
6. Use Mirrors to Create Visual Space
Mirrors are useful in both interior design and photography.
They reflect light, create visual depth, and make compact spaces appear brighter.
A carefully positioned mirror can improve the composition and make the room feel more open.
Position Mirrors Near Windows
A mirror placed opposite or near a window can reflect daylight into darker parts of the room.
This creates a brighter appearance and adds visual interest.
Avoid Unwanted Reflections
Mirrors can also create problems during photography.
Check whether the mirror reflects the photographer, camera, tripod, or unwanted objects.
Move the camera slightly if necessary.
Use Mirrors as Composition Elements
A large wall mirror can become an attractive focal point.
These Small bedroom photography ideas are especially useful when photographing bedrooms with limited natural light.
7. Use Composition to Make Rooms Look Bigger
Composition describes how objects are arranged within a photograph. Good composition helps viewers understand the layout and creates a natural visual flow.
One of the most important Small Room Photography Tips is to avoid filling the entire frame with furniture. A clean and balanced composition makes even a small room appear more spacious and attractive.
Include Empty Space
Empty space gives the photograph room to breathe.
Show some visible floor and wall space instead of including too many objects. This is one of the simplest Small Room Photography Tips for making a compact room look bigger.
For example, a bedroom photograph that includes the bed, a bedside table, and part of the floor may look more attractive than one filled with several decorative objects.
Use Leading Lines
Leading lines guide the viewer’s eyes through a photograph.
Common examples include:
- Floor edges.
- Wall corners.
- Ceiling lines.
- Furniture edges.
- Hallways.
- Window frames.
Use these elements to guide attention towards the main subject. Leading lines also create a sense of depth, making them useful when applying Small Room Photography Tips to narrow spaces.
Apply the Rule of Thirds
Imagine dividing the photograph into nine equal sections using two horizontal and two vertical lines.
Place important elements along these lines or near their intersections.
This can create a balanced composition without making the room feel crowded. Applying this technique is another effective way to improve your Small Room Photography Tips and achieve professional-looking interior photographs.
Photograph Through Doorways
Doorways create natural frames around an interior.
Taking a photograph from the entrance can show the room’s depth and overall layout.
It is one of the easiest Small Room Photography Tips when you cannot move far away from the subject. Doorway framing also helps viewers understand the room’s arrangement while adding visual depth to the photograph.ect.
8. Select the Best Camera Settings
Correct camera settings help you capture sharp photographs with balanced exposure.
You do not need complicated settings to photograph small interiors. Understanding aperture, ISO, and shutter speed is usually enough to get started.
Use a Narrow Aperture
For interior photography, an aperture between f/8 and f/11 is a useful starting point.
A narrow aperture helps keep most of the room in focus.
This is useful when you want the bed, furniture, walls, and architectural details to appear sharp.
Keep ISO Low
ISO controls the camera’s sensitivity to light.
A lower ISO, such as 100 or 200, usually produces cleaner photographs with less visible noise.
Use a tripod when photographing in low-light conditions so you can maintain a low ISO.
Adjust Shutter Speed
Shutter speed controls how long the camera sensor receives light.
When using a tripod, you can use slower shutter speeds to capture more light.
For example, a shutter speed of 1/4 second or 1 second may work in a darker room, depending on the lighting conditions.
Shoot in RAW Format
RAW files preserve more image information than standard JPEG files.
They provide greater flexibility when adjusting exposure, highlights, shadows, and white balance during editing.
These Small Room Photography Tips can help you achieve more consistent results.
9. Use a Tripod for Sharp Photographs
A tripod is one of the most useful accessories for interior photography.
It keeps the camera stable and allows you to maintain consistent framing. Using a tripod is one of the essential Small Room Photography Tips for capturing sharp and professional-looking interior images.
Improve Low-Light Photography
Small rooms may not receive enough daylight.
A tripod allows you to use slower shutter speeds without introducing camera shake.
This helps maintain a low ISO and capture more detail, especially when following Small Room Photography Tips for darker interiors.
Maintain Consistent Composition
Once you find the best camera angle, lock the tripod into position.
This makes it easier to capture multiple photographs from the same position.
Consistent framing also helps when creating a professional interior photography portfolio.
Try Exposure Bracketing
Exposure bracketing involves taking several photographs at different exposure levels.
These images can later be blended to balance bright windows and darker interiors.
Use a tripod to keep the composition consistent across all exposures. This is one of the most practical Small Room Photography Tips for achieving balanced lighting.
10. Explore Small Bedroom Photography Ideas
Bedrooms can be challenging to photograph because beds, wardrobes, and storage furniture occupy a large part of the available space.
However, good planning and composition can make even a compact bedroom look attractive. Applying Small Room Photography Tips can help you capture the available space more effectively.
Here are some useful Small bedroom photography ideas to try.
Photograph the Bed from an Angle
A diagonal angle shows the shape of the bed and creates depth.
Try photographing from one corner rather than standing directly in front of the bed.
Highlight the Window
Windows can make a bedroom look brighter.
Include the window in your composition while maintaining details in the surrounding furniture and walls.
Capture Storage Features
Photograph built-in wardrobes, wall shelves, and under-bed storage.
These features are useful in compact bedrooms and can add practical value to interior photographs.
Use Minimal Decorations
Too many accessories can make a small bedroom look crowded.
Use simple bedding, neutral colours, and a few decorative items.
Capture Attractive Details
Wide photographs show the complete room, while close-up photographs highlight its personality.
Capture details such as:
- Headboard designs.
- Bedside lamps.
- Decorative cushions.
- Curtains.
- Wall shelves.
- Wooden furniture.
- Textured fabrics.
These Small bedroom photography ideas can help you create a complete collection of bedroom photographs while applying effective Small Room Photography Tips.
11. Use Colours and Textures Carefully
Colours influence how viewers perceive an interior.
Light colours generally reflect more light, while dark colours can make some areas appear visually heavier.
However, dark interiors can also look attractive when photographed with balanced lighting.
Highlight Light-Coloured Walls
White, cream, beige, and pastel shades can create a bright appearance.
Make sure your exposure retains the details and textures of the walls.
Avoid excessive brightness that removes all visible detail.
Create Natural Colour Contrast
A little contrast can make the photograph more interesting.
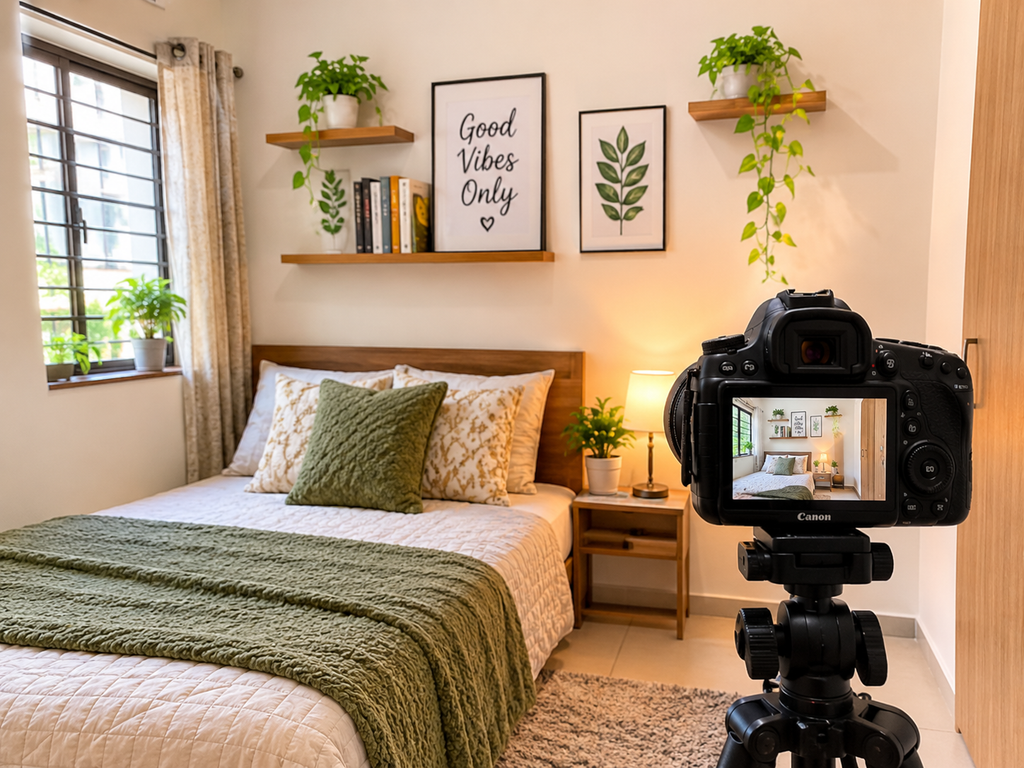
For example, a cream bedroom with wooden furniture and green plants can look attractive without appearing crowded.
Capture Natural Materials
Wood, cotton, linen, and other natural materials add texture.
Use soft light to highlight their surface details.
Good colour balance is one of the most valuable Small Room Photography Tips for creating realistic photographs.
12. Photograph Small Living Rooms and Apartments
Living rooms and studio apartments often have multiple functions.
They may include seating, entertainment units, dining areas, and storage.
The challenge is to capture these features without making the photograph look crowded.
Show Different Functional Areas
Try to show how different areas connect.
For example, a studio apartment photograph may include the seating area, dining table, and kitchen entrance.
Choose an angle that explains the layout clearly.
Avoid Blocking Important Features
Make sure large furniture does not hide windows, doors, or attractive architectural details.
Move smaller objects when necessary.
Capture Wide and Detail Photographs
Take wide photographs to show the complete living area.
Then capture separate images of furniture, lighting, storage, and decorations.
These Small Room Photography Tips are especially useful for property listings and interior design portfolios.
13. Use Editing to Enhance the Space
Editing is an important part of interior photography.
Even a well-composed photograph may need adjustments to exposure, colour, perspective, and contrast.
The goal is to improve the image while maintaining the room’s actual appearance.
Correct Perspective Distortion
Wide-angle lenses can make walls and furniture appear distorted.
Use perspective correction tools to straighten vertical lines and improve the composition.
Adobe Lightroom and Photoshop offer useful tools for architectural photography.
Adjust Exposure and Brightness
Increase exposure slightly if the room looks too dark.
Recover highlights around windows and brighten shadows where necessary.
Avoid making every part of the image equally bright.
Correct White Balance
White balance affects how warm or cool colours appear.
If the photograph has a yellow or blue colour cast, adjust the temperature and tint.
Try to maintain the actual appearance of walls, floors, and furniture.
Improve Sharpness
Sharpening can improve visible details in furniture and architectural features.
However, excessive sharpening can create artificial edges and noise.
Apply adjustments gradually.
Avoid Overediting
Do not digitally stretch the room or remove permanent architectural features to make it look larger.
The final photograph should look attractive while representing the actual space.
Following these Small Room Photography Tips helps you create realistic and professional images.
14. Best Equipment for Small Room Photography
You do not need an expensive photography setup to capture attractive interiors.
A basic camera and a few useful accessories can produce excellent results.
| Equipment | Purpose |
|---|---|
| DSLR or mirrorless camera | Captures high-quality photographs |
| Wide-angle lens | Captures more of the room |
| Tripod | Maintains camera stability |
| Remote shutter release | Reduces camera shake |
| Reflector | Redirects available light |
| External flash | Brightens darker areas |
| Editing software | Improves exposure and perspective |
Choose equipment based on your photography needs and budget.
Beginners can start with a smartphone or entry-level camera. Learning composition and lighting is more important than buying expensive equipment.
15. Smartphone Photography Tips for Small Rooms
Modern smartphones can capture attractive interior photographs.
You do not always need a professional camera to photograph a compact bedroom or living room.
Clean the Camera Lens
A dirty camera lens can make photographs appear blurry or hazy.
Clean the lens before taking pictures.
Use the Main Camera
The main camera often provides better image quality than the front camera or digital zoom.
Use the wide-angle camera only when necessary.
Avoid Digital Zoom
Digital zoom can reduce image quality.
Instead, move carefully to a better shooting position.
Keep the Phone Level
Use the grid feature to keep walls, doors, and furniture straight.
Avoid pointing the phone too sharply upwards or downwards.
Use a Smartphone Tripod
A tripod helps capture sharp photographs in low-light conditions.
These Small Room Photography Tips are useful for homeowners and beginners who want to improve their smartphone photography.
16. Common Mistakes to Avoid
Understanding common photography mistakes can help you improve your results.
Using the Wrong Camera Angle
A poor shooting position can make a room look narrow and unbalanced.
Experiment with different corners and camera heights.
Using Excessive Wide-Angle Distortion
An extremely wide lens can make furniture look unnatural.
Choose a suitable focal length and maintain realistic proportions.
Ignoring Lighting
Poor lighting can hide important details and create unwanted shadows.
Use natural light whenever possible.
Including Too Much Clutter
Unnecessary objects distract viewers from the interior design.
Prepare the room before taking photographs.
Overediting the Image
Excessive brightness, contrast, and perspective correction can make photographs look artificial.
Maintain natural colours and realistic proportions.
17. How to Photograph Small Rooms for Real Estate Listings
Real estate photography requires attractive but accurate photographs.
Potential buyers and tenants want to understand the room’s layout, lighting, and available space.
Show the Complete Layout
Capture photographs that explain the relationship between furniture, windows, doors, and storage areas.
Highlight Useful Features
Focus on built-in storage, natural lighting, balcony access, and other genuine features.
Capture Multiple Angles
Take photographs from different corners to provide a better understanding of the room.
Maintain Accuracy
Do not remove permanent features or digitally change the dimensions of the property.
These Small Room Photography Tips help create trustworthy property photographs that present interiors clearly.
18. SEO and GEO Tips for Interior Photography Images
Good photography can improve the visual quality of a blog, but image optimization also matters.
If you publish interior photography articles on your website, optimize images so that search engines and AI systems can understand their content.
Use Descriptive Image Names
Avoid generic names such as IMG_1234.jpg.
Use descriptive names such as:
- small-room-photography-tips.jpg
- small-bedroom-photography-ideas.jpg
- compact-living-room-interior.jpg
- natural-light-bedroom-photography.jpg
Write Descriptive Alt Text
Alt text explains what an image shows.
Example:
“Small bedroom photographed from a corner using natural window light.”
Use natural descriptions instead of repeating keywords unnecessarily.
Compress Your Images
Large image files can slow down your website.
Use image compression and modern formats such as WebP to reduce file sizes while maintaining good image quality.
Add Useful Image Captions
Captions provide context for readers.
For example, a caption could explain how photographing from a corner helps show more of a compact bedroom.
Make Content Easy for AI Search
GEO-friendly content should provide clear and useful answers.
To improve your content:
- Answer the main question directly.
- Use descriptive headings.
- Include practical photography examples.
- Explain technical terms.
- Add relevant FAQs.
- Use accurate image descriptions.
- Include trustworthy references where appropriate.
For local relevance, examples can mention compact apartment layouts commonly found in Chennai and other Indian cities.
19. A Simple Step-by-Step Workflow for Photographing Small Rooms
A consistent workflow can make interior photography easier.
Follow these steps before publishing your photographs.
Step 1: Prepare the room. Remove clutter, arrange furniture, and organize decorations.
Step 2: Check the lighting. Open curtains and observe how daylight enters the room.
Step 3: Choose your lens. Select a suitable wide-angle lens without excessive distortion.
Step 4: Find the best position. Try different corners and choose an angle that shows the room clearly.
Step 5: Set up your tripod. Keep the camera stable and level.
Step 6: Adjust camera settings. Start with a narrow aperture and low ISO. Adjust shutter speed based on available light.
Step 7: Take multiple photographs. Capture wide views and important interior details.
Step 8: Review your images. Check exposure, sharpness, composition, and vertical lines.
Step 9: Edit carefully. Correct colours, perspective, and brightness without changing the actual room.
Step 10: Optimize images. Use descriptive file names, useful alt text, and compressed image formats.
Following this workflow makes Small Room Photography Tips easier to apply during real photography projects.
20. Final Tips for Better Small Room Photography
Improving interior photography takes practice.
Do not depend on a single camera angle or lighting setup. Experiment with different compositions and compare the results.
Here are some final Small Room Photography Tips to remember:
- Keep the room clean and organized.
- Use a suitable wide-angle lens.
- Photograph from room corners.
- Keep the camera level.
- Make the most of natural light.
- Use mirrors to reflect light.
- Include visible floor and wall space.
- Keep ISO low when possible.
- Use a tripod for sharp photographs.
- Correct perspective carefully.
- Maintain realistic colours.
- Avoid excessive editing.
You can also explore different Small bedroom photography ideas by changing the camera position, highlighting window light, capturing furniture details, and experimenting with minimal compositions.
The most important lesson is that good photography is about showing the available space clearly. You do not need expensive equipment or complicated editing techniques to create attractive interior photographs.
Conclusion
Photographing small rooms requires careful planning, good lighting, thoughtful composition, and the right camera position.
By applying these Small Room Photography Tips, you can make compact bedrooms, living rooms, and apartments look brighter, more open, and more attractive.
Start by preparing the room and removing unnecessary objects. Choose a suitable wide-angle lens, photograph from a corner, and keep the camera level. Use natural light, create balanced compositions, and make small adjustments during editing.
You can also experiment with mirrors, different camera settings, and Small bedroom photography ideas to improve your results.
Whether you are photographing a small bedroom for an interior design portfolio or capturing an apartment for a real estate listing, these methods can help you create professional-looking images.
Remember that the best interior photographs are not necessarily taken with the most expensive cameras. They are created by photographers who understand light, perspective, and composition.
Practice these techniques, experiment with different angles, and focus on showing the room’s best features.
Frequently Asked Questions (FAQs)
1. How do you photograph a small room to make it look bigger?
Use a wide-angle lens, photograph from a corner, and keep the camera level. Remove unnecessary objects and use natural light to create a brighter appearance. Leaving visible floor and wall space can also make the room look more open.
2. Which lens is best for small-room photography?
A wide-angle lens is generally suitable for small-room photography. For full-frame cameras, 16mm to 24mm is a useful starting range. Choose a lens that captures enough space without creating excessive distortion.
3. What camera settings are best for interior photography?
A good starting point is an aperture of f/8 to f/11 and ISO 100 or 200. Adjust shutter speed according to the available light. Use a tripod to maintain sharpness when using slower shutter speeds.
4. How can I make a small bedroom look bigger in photographs?
Keep the bedroom organized, use soft natural light, and photograph from a corner. Arrange the bed neatly, remove unnecessary furniture, and use mirrors to reflect light. These Small bedroom photography ideas can create a more spacious appearance.
5. Is natural light better for photographing small rooms?
Natural light is often a good choice because it produces soft and realistic illumination. Open curtains and photograph when the daylight is balanced. Artificial lighting can also brighten darker areas.
6. Can I photograph small rooms with a smartphone?
Yes. Modern smartphones can capture attractive interior photographs. Use the wide-angle camera when needed, keep the phone level, avoid digital zoom, and use a stable shooting position.
7. How do mirrors help in interior photography?
Mirrors reflect light and create visual depth. When positioned carefully, they can make compact spaces appear brighter and more open. Make sure they reflect attractive parts of the room.
8. What is the best camera angle for small bedrooms?
A corner angle is often a good choice because it captures multiple walls and creates depth. Keep the camera level and experiment with different heights to find the most natural composition.
9. How can I avoid distortion in small-room photographs?
Avoid extremely wide focal lengths, keep the camera level, and use perspective correction during editing. Make sure walls, windows, and doors maintain their natural proportions.
10. Which editing software is best for interior photography?
Adobe Lightroom and Photoshop are popular options. They provide tools for exposure correction, white balance, perspective adjustment, and image sharpening. Beginners can also use simpler mobile editing applications.