
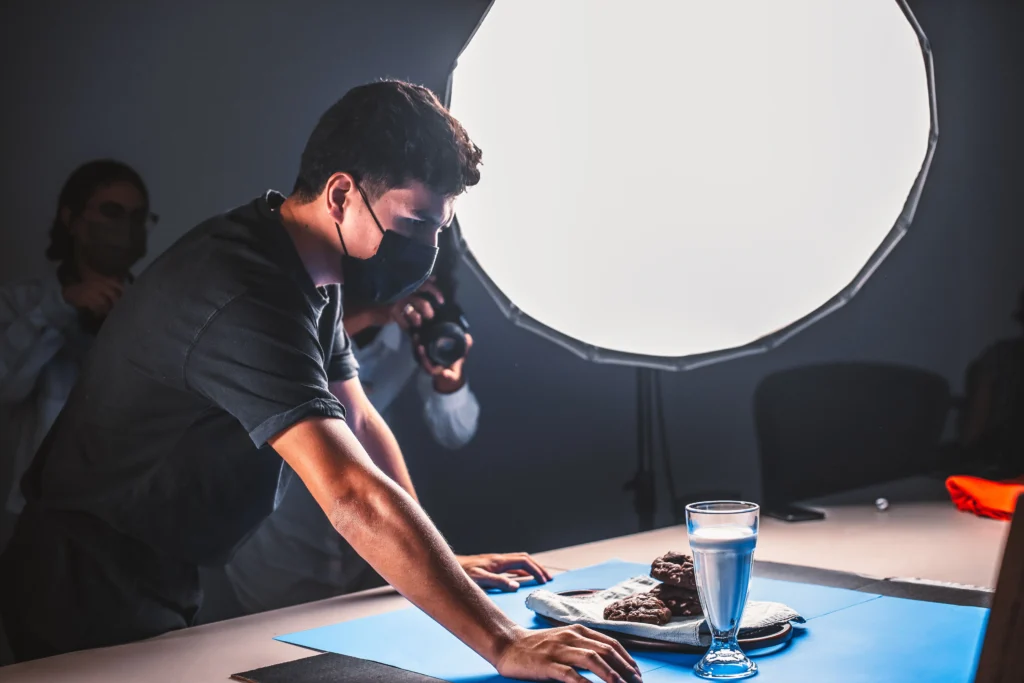
Product Photography: Techniques and Tips to Make Products Sell
Quick answer: Product photography is the craft of photographing items so they look clear, accurate, and appealing to buyers. The best product photography techniques are soft light, a clean background, a tripod, sharp focus, consistent angles, and light editing. Get these six right, and your product photos will look professional.
A shopper cannot pick up your product, turn it over, or feel the material. Your photos do all of that work. Good product photography builds trust, answers questions, and turns browsers into buyers.
This guide covers product photography from start to finish. You will learn about gear, camera settings, lighting, backgrounds, angles, editing, and image SEO. Every one of the product photography techniques here works with a camera or a phone.
What Is Product Photography?
Product photography is the practice of photographing goods for online stores, catalogs, ads, and packaging. The goal is simple: show the item clearly and truthfully, in a way that makes someone want to buy it.
It differs from art photography. You are not chasing mood for its own sake. You are giving a buyer the information they need to decide. Strong product photography is sharp, evenly lit, and accurate in color.
Most shoots fall into these types:
- White background: Clean shots on pure white, often required by marketplaces
- Lifestyle: The product in use, in a real setting
- Detail: Close-ups of texture, stitching, ports, or labels
- Scale: The product next to a hand or a common object to show size
- Flat lay: Items arranged from above on a styled surface
- Group: Sets, bundles, and collections
- 360 and video: Spins and short clips that show every side
Why Product Photography Matters
Online shoppers decide in seconds. Images are the first thing they see, and often the only thing they study closely. A dull or dark photo makes a good item look cheap. A bright, sharp one makes it look worth the price.
Professional product photography also lowers returns. When the photo matches the real item, buyers are not surprised. Marketplaces such as Amazon and Etsy, and Shopify stores too, reward clear images with more clicks and more sales. Investing in better photos is one of the cheapest ways to lift a store’s results.
Good images help search as well. They keep visitors on the page longer, appear in image search, and earn shares. That is why every online seller should learn the product photography techniques in this guide.
Gear for Product Photography
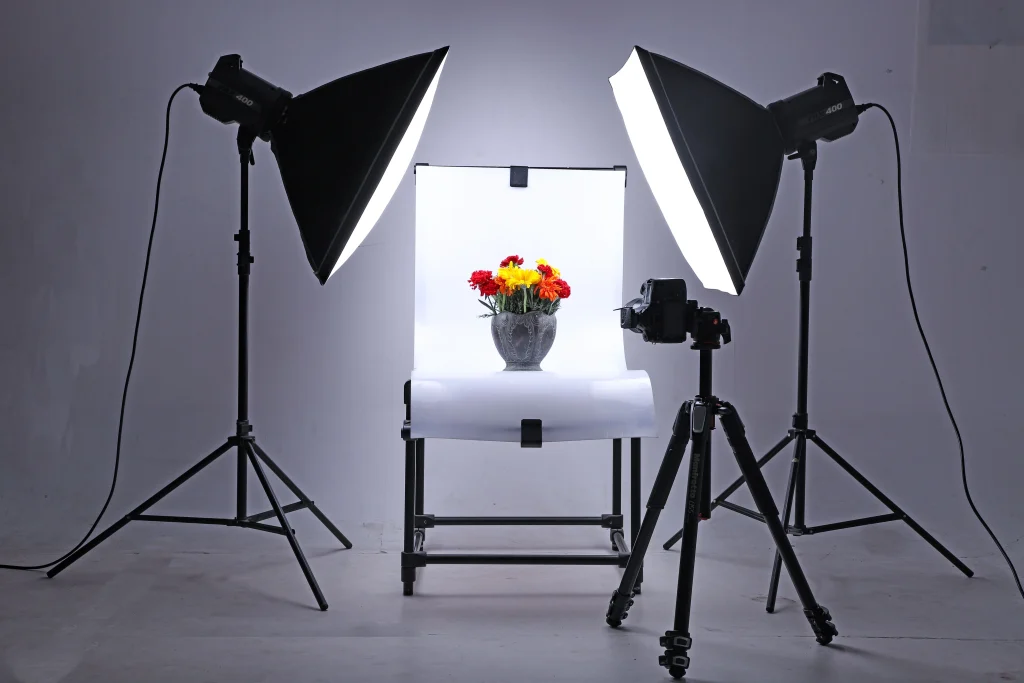
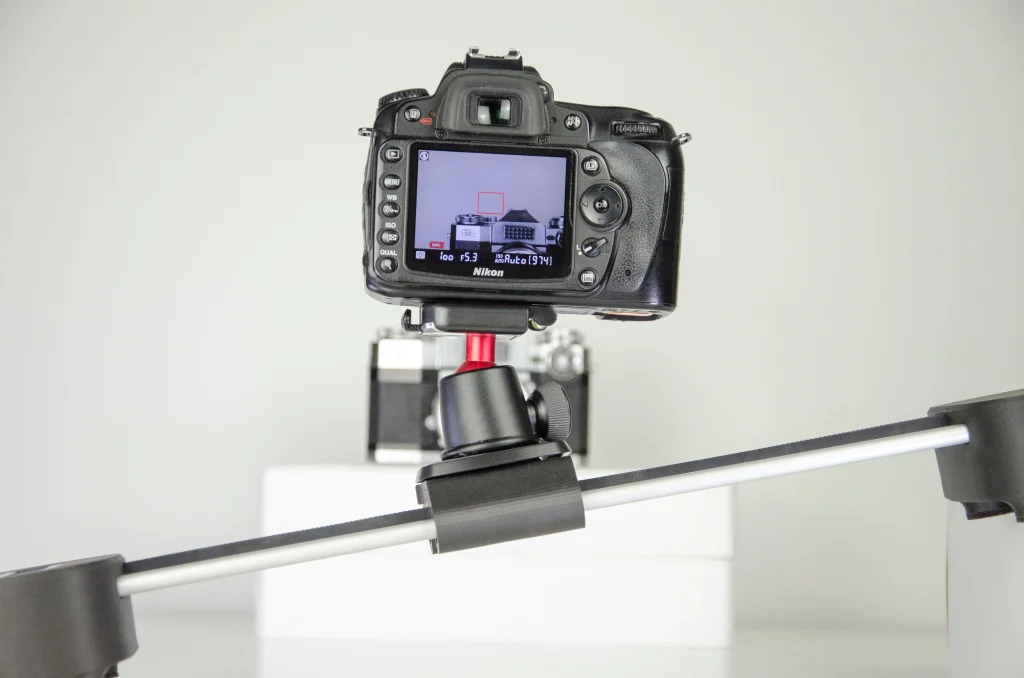
You do not need a studio. Start with simple tools and upgrade when you need to.
1. A Camera With Manual Control
Any camera with manual mode works for product photography. An entry-level mirrorless or DSLR is enough. A recent phone also works well, especially for small items.
2. The Right Lens
A 50mm lens is a good all-round choice. A 90mm or 100mm macro lens is best for small items, jewelry, and fine detail. Avoid very wide lenses, which stretch shapes and distort the product. A longer lens gives natural proportions. Lens choice is one of the most important product photography techniques for getting shapes right.
3. A Sturdy Tripod
A tripod keeps every shot sharp and every angle repeatable. When you shoot a catalog, repeat angles matter. A tripod also lets you use a small aperture and a low ISO.
4. Lights and Modifiers
A softbox or LED panel with a diffuser gives soft, even light. Natural window light is free and works well. Add a white foam board to bounce light into the shadows and a black card to deepen them.
5. Backdrops and Surfaces
White paper or a white acrylic sheet suits most catalogs. Colored paper, wood boards, tiles, and fabric work for lifestyle sets. Choose backgrounds that make the product stand out instead of competing with it.
6. Small Helpers
Clamps, tape, museum putty, a lint roller, cotton gloves, a microfiber cloth, and a small brush will save hours of editing. A remote release or timer prevents shake.
Camera Settings: Product Photography Techniques for Sharp Images
Start with these settings for most product photography:
- Mode: Manual or aperture priority
- Aperture: f/8 to f/11 for sharp detail across the product
- ISO: 100 or the lowest native value
- Shutter speed: Whatever the exposure needs, since you are on a tripod
- Focus: Manual or single-point, checked with live view zoom
- White balance: Custom, set with a gray card
- File format: RAW
These settings give clean, sharp images with little noise. Avoid f/22. It adds diffraction and softens fine detail. For deep objects, use focus stacking: take several frames at different focus points and blend them later.
Lighting: Product Photography Techniques That Work
Light is the heart of product photography. The same item can look dull or stunning depending on how it is lit.
Use Soft Light
Soft light has gentle shadows and smooth highlights. Use a large source close to the product. The closer and larger the light, the softer the result. Place it to the side and slightly in front of the item.
Try Window Light
Set up a table near a large window. Keep direct sun out by using a thin white curtain. Place a white card on the opposite side to fill shadows. This simple setup is the best entry point for product photography on a budget.
Add a Reflector
A reflector bounces light back into shadows. White gives a soft fill. Silver is brighter. Black adds depth by removing light. Move the reflector in small steps and watch the shadows change.
Build a Simple Light Tent
A light tent is a cube of white fabric. Lights shine through it from outside, which gives even, shadow-soft results. It suits small, shiny items, and it is among the easiest product photography techniques for beginners.
Control Reflections
Glass, metal, and gloss reflect everything around them. Use large, soft light sources and black or white cards to shape reflections. A polarizing filter cuts glare on non-metal surfaces. Check every edge for stray reflections before you press the shutter.
Keep Your Light Consistent
Use the same light setup for every item in a catalog. Mark the positions of the lights and the product on the table with tape. Consistent light makes a store look polished and trustworthy.
White Background Product Photography
Most marketplaces ask for a pure white background. Here is how to get it:
- Place the product on a white sheet that curves up behind it.
- Light the background separately so it reads as bright white.
- Expose for the product, not the background.
- Add a small shadow or reflection for a grounded look.
- Clean up the edges in editing.
Aim for a background value near 255 on a 0 to 255 scale, which is pure white. Do not clip the product’s own highlights while you do it. Clean white-background product photography is a basic skill for any seller.
Lifestyle Product Photography
Lifestyle images show the product in use. A mug on a kitchen table, a bag on a shoulder, or a lamp in a living room all help buyers picture the item in their own lives.
Keep the product the clear hero. Use props that fit the story, such as a plant, a napkin, or a cup of coffee. Do not crowd the scene. Use soft window light and a shallow aperture, such as f/4, to blur the background. Colors should match the brand.
Mix lifestyle and white-background shots in each listing. Lifestyle builds emotion. White background builds clarity. Together, they make strong product photography.
Props and Styling
Props add context, but they can also steal attention. Choose a few items that tell a simple story. A skincare bottle looks natural beside a towel and a leaf. A wallet looks natural beside keys and a notebook.
Keep colors in the same family as the product or the brand. Avoid logos on props that compete with yours. Place props at different heights and distances to build depth. Leave breathing room around the main item. If you doubt a prop, remove it.
Composition: Product Photography Techniques for Better Images
A clean composition guides the eye.
- Use the rule of thirds. Place the product slightly off-center for a natural look.
- Leave negative space. Empty room around the product helps with text overlays and layouts.
- Keep the product straight. Lines should look level and true.
- Fill the frame for detail. Move close when you want to show texture.
- Check the edges. Look for dust, lint, or stray props.
- Follow a style. Keep the same angle, crop, and spacing across a set.
Angles That Sell
Different products need different angles. Plan a shot list for each item.
- Front view: The main image for most products
- Three-quarter view: Shows depth and shape
- Side and back views: Show features and ports
- Top-down view: Great for flat items and flat lays
- Close-up: Shows texture, materials, and quality
- In-hand shot: Shows scale and feel
- Packaging shot: Shows what arrives at the door
Shoot at the angle a buyer would naturally look at the item. Do not use extreme wide lenses or odd tilts. Honest angles lower returns.
Product Photography for Tricky Materials
Shiny and Metal Items
Use large, soft light and black and white cards to shape reflections. Shoot at a slight angle to avoid mirror-like glare. Clean every fingerprint.
Glass and Transparent Items
Backlight the item with a bright panel and use black cards at the sides to define the edges. For liquids, add a small light behind the bottle.
Jewelry
Use a macro lens, a tripod, and focus stacking. Clean every piece. Use a light tent and tweezers or putty to position the item. Shoot at f/11 and stack frames for depth.
Clothing
Use a mannequin, a hanger, or a clean flat lay. Steam wrinkles first. Show the front, back, and close-ups of fabric and labels. On models, keep light soft and even.
Food and Drink
Use fresh items and shoot fast. Side light adds texture. Add steam, drips, or crumbs for life, but keep the plate clean.
Small Electronics
Wipe screens and remove dust. Turn displays on or use a screen image. Shoot ports and buttons up close.
Cosmetics
Show swatches, textures, and clean packaging. Keep labels straight and in focus.
Knowing how to adapt product photography techniques to each material is what separates basic shots from professional ones.
Product Photography Techniques for Beginners
New to this field? Start with a simple plan:
- Choose one product and one clean surface.
- Set up a table next to a window.
- Use a tripod and shoot in RAW.
- Add a white card to fill the shadows.
- Take shots from the front, three-quarter, top, and close-up.
- Edit lightly: crop, straighten, and fix white balance.
- Compare your shots to listings you admire and note the gaps.
The best product photography techniques for beginners are simple: soft light, a steady camera, and a clean background. Practice beats gear every time.
Smartphone Product Photography
A phone can produce excellent product photography for small shops. Follow these steps:
- Wipe the lens.
- Turn on the grid and keep the phone level.
- Tap to lock focus and exposure.
- Use the main lens or the 2x lens, not the ultra-wide.
- Shoot near a window and avoid the flash.
- Use a small tripod or a stand.
- Edit gently in a free app.
Many phones also have a pro or RAW mode. Use it for more control.
Step-by-Step Shooting Workflow
A set routine saves time on every shoot:
- Prepare: Clean the product, steam or press fabric, and remove dust.
- Set up: Place the backdrop, light, and tripod.
- Test: Take a few frames and check focus, color, and reflections.
- Shoot: Capture the full shot list, front to back.
- Review: Zoom in and check sharpness and dust.
- Edit: Batch correct, then fine-tune each image.
- Export: Save in the right sizes and formats.
- Back up: Store files in two places.
Editing Product Photography

Editing is where good images become consistent. Follow a simple order:
- Cull and select the best frames.
- Crop and straighten.
- Set white balance so whites look clean and colors are accurate.
- Adjust exposure, contrast, and shadows.
- Remove dust, lint, and scratches.
- Clean the background to pure white if needed.
- Sharpen lightly and export.
Keep colors accurate. If a blue shirt looks teal on screen, buyers will feel misled and return it. Shoot a gray card or color chart in the first frame of each session to set color correctly. Do not over-edit. Natural product photography earns trust.
Clipping Paths and Retouching
For catalogs with many images, use a clipping path or a mask to cut out the product cleanly. Pros also use frequency separation for smooth surfaces and dodge and burn to add shape. Learn these once you master the basics.
Keep Your Catalog Consistent
Consistency makes a store look professional. Use the same background, crop, angle, and light for every item in a category. Save presets and templates. Set simple rules, such as the product fills 80 percent of the frame and sits in the center with equal space around it. Consistent product photography helps shoppers compare items fast and builds brand recognition.
360 Spins and Product Video
Many shoppers now expect motion. A 360 spin lets buyers turn the item and see every side. You can make one with a small turntable, a tripod, and a set number of frames, such as 24 or 36. Keep the light and camera fixed, and rotate the item in equal steps.
Short videos work well too. Show the product in use, add a slow pan, or demo a key feature. Keep clips under 30 seconds. Use a tripod or a gimbal, shoot in good light, and add simple captions. Start with still images, then add motion as your skills grow.
Product Photography Mistakes to Avoid
- Harsh light: Use diffusion and bounce.
- Wrong color: Set white balance and use a gray card.
- Dust and fingerprints: Clean the product and check at 100 percent.
- Cluttered background: Keep it simple.
- Wide lens distortion: Use 50mm to 100mm.
- Inconsistent style: Follow a template.
- Over-editing: Keep the item true to life.
- Too few images: Show every angle and detail.
Most mistakes in product photography come from rushing. Slow down, check every frame, and keep notes on what works.
Troubleshooting Common Problems
Images look yellow or blue: Set a custom white balance and use a gray card.
Shadows look harsh: Move the light closer, add a diffuser, or add a white fill card.
The background looks gray: Light the background separately and raise the exposure on it.
Details look soft: Use a tripod, a smaller aperture, and focus stacking.
Glass or metal shows reflections: Change the angle, use larger soft lights, and add black cards.
Photos look flat: Move the light to the side and add a small shadow for depth.
Product Photography Checklist
Use this list before every shoot:
- Product: Clean, pressed, and styled
- Gear: Tripod, lens, light, backdrop, helpers
- Settings: f/8 to f/11, low ISO, RAW, custom white balance
- Light: Soft, even, and consistent
- Background: Clean and matched to the brief
- Angles: Front, three-quarter, side, back, top, and detail
- Edit: Accurate color, clean background, light sharpening
- Export: Right size, format, and file name
Starter Settings for Common Setups
| Setup | Aperture | ISO | Notes |
|---|---|---|---|
| White background | f/8 to f/11 | 100 | Light the background separately |
| Lifestyle shot | f/2.8 to f/5.6 | 100 to 400 | Use soft window light |
| Jewelry or macro | f/11 | 100 | Use focus stacking |
| Flat lay from above | f/8 | 100 to 200 | Keep the camera parallel |
| Glass or bottle | f/8 | 100 | Backlight with a panel |
Treat these as starting points and adjust to the light you have.
Marketplace Requirements
Each platform has rules. Check them before you shoot.
- Amazon: Pure white background on the main image, the product fills most of the frame, and the resolution is high enough for zoom
- Etsy: Square or near-square images work well, with a mix of lifestyle and detail
- Shopify and your own site: Pick one size and style, and keep it consistent
Rules change, so check each platform’s current guide before you upload. Following the rules keeps your listings live and helps your product photography reach more shoppers.
Image SEO for Product Photography
Great photos help only if people can find them. Use these steps:
- File names: Use clear names, such as blue-ceramic-mug-front.jpg
- Alt text: Describe the image in plain words
- File size: Compress images so pages load fast
- Format: Use WebP or JPEG for the web
- Structured data: Add product schema to listings
- Multiple images: Give each product several views
Fast, well-labeled product photography improves search visibility and shopping results.
Hiring Product Photography Services
Some sellers prefer to hire help. This makes sense when you have many items, tricky materials, or a launch deadline. Professional product photography services bring lighting skill, retouching, and speed.
Ask to see a portfolio of similar items. Confirm the number of images, angles, turnaround time, editing, and usage rights. Request a test shot or a small first batch. Prices vary by item type and volume, so get two or three quotes. A good partner will also follow your brand style and marketplace rules.
Starting a Product Photography Business
Many photographers turn this skill into steady income. Small brands, online stores, and marketplace sellers all need fresh images often.
Start by building a portfolio of 15 to 25 strong images across different materials. Offer a few low-cost projects to local shops to gain testimonials. Create clear packages, such as a set number of white-background shots, lifestyle shots, and edits. Quote by image or by product, and spell out delivery time and usage rights.
Reach out to local brands, makers, and online sellers. Share your work on a simple website and on social platforms. A product photography business grows through repeat clients, so deliver on time and keep your style consistent.
Practice Ideas to Improve Fast
- Photograph the same item in three kinds of light
- Shoot one product on white, then in a lifestyle setting
- Recreate a listing photo you admire
- Build a light tent from a box and white fabric
- Edit one image three ways and pick the most natural look
Frequently Asked Questions
What is product photography?
Product photography is the practice of photographing goods for online stores, catalogs, ads, and packaging. It focuses on sharp, evenly lit images that show the item clearly and truthfully.
What are the best product photography techniques?
The best product photography techniques are soft, consistent light, a clean background, a tripod, sharp focus, honest angles, and light editing. Master these before you buy more gear.
What camera is best for beginners?
Any camera with manual mode works. Many modern phones also do well, especially with good light and a small tripod.
What lens should I use?
A 50mm lens suits most items, and a 90mm to 100mm macro lens suits small items and jewelry. Avoid very wide lenses, which distort shapes.
How do I get a pure white background?
Light the background separately from the product, expose for the product, and clean the edges in editing. Aim for a value near 255.
How do I start at home?
Set up a table near a window, add a white card to fill shadows, and use a tripod. Shoot in RAW, and edit lightly.
How many images does each listing need?
Plan five to nine images: a main shot, side and back views, a close-up, a scale shot, and a lifestyle shot.
Key Takeaways
- Light matters most. Use soft, even, consistent light.
- Keep backgrounds clean and angles honest.
- Use a tripod and shoot in RAW.
- Keep colors accurate and edits natural.
- Use the same style across your whole catalog.
Conclusion
Product photography is a skill anyone can learn. Choose the right lens, control the light, keep backgrounds clean, and edit with care. Every shoot teaches you something new.
Start with the checklist on your next shoot. Build a simple setup, repeat it, and improve one habit at a time. With practice, your images will look sharper, feel more trustworthy, and help your products sell.