
Introduction
Light is one of the most important elements in photography. It affects how a subject looks, how colours appear, and how much detail a photograph captures. Even with an expensive camera, poor lighting can make an image look dull or unattractive. Learning Natural light photography tips can help beginners understand how to use available light and capture better images.
The good news is that you do not need expensive lighting equipment to take beautiful photographs. Natural light from the sun, windows, and open spaces can help you create professional-looking images. Applying simple Natural light photography tips allows you to improve image quality using the light already available around you.
Learning Natural light photography tips is a great starting point for beginners who want to improve their photography skills without spending money on additional equipment.
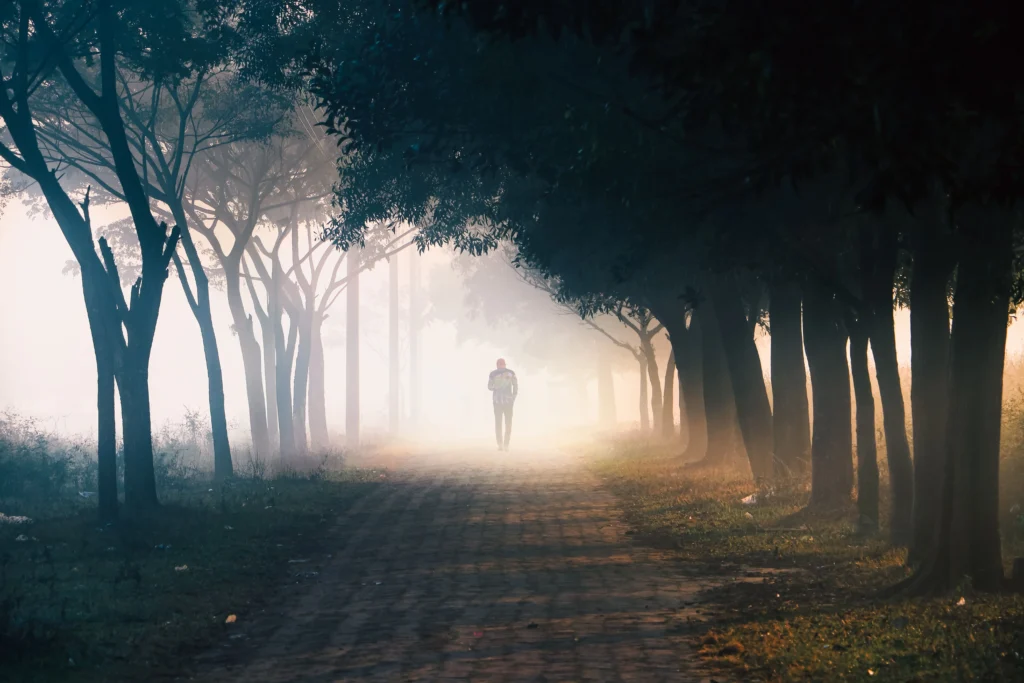
Natural light changes throughout the day. Morning sunlight can create a soft and peaceful atmosphere, while afternoon sunlight can produce strong shadows and bright highlights. Evening light often creates warm colours and beautiful backgrounds.
Understanding these changes helps you choose the right time, location, and camera settings for every photograph.
Whether you enjoy portrait photography, landscape photography, food photography, or interior photography, learning to work with available light can improve your results.
In this guide, you will discover simple lighting techniques, camera settings, composition ideas, and practical exercises to help you capture better photographs using natural light.
1. Understand What Natural Light Photography Means
Natural light photography is the process of capturing images using existing light from natural sources rather than relying on artificial lighting equipment. Learning Natural light photography tips helps beginners understand how to use available light and capture attractive photographs.
The sun is the main source of natural light. However, sunlight is not the only option. Light entering through windows, reflected sunlight, and open-sky illumination can also help create beautiful photographs.
For beginners, understanding natural light is important because it helps you make better decisions before taking a picture.
Different Sources of Natural Light
Direct Sunlight
Direct sunlight occurs when the sun’s rays fall directly on a subject.
It creates strong highlights, dark shadows, and high contrast. This lighting can work well for dramatic outdoor photographs.
However, direct sunlight can sometimes create harsh shadows on people’s faces.
Indirect Sunlight
Indirect sunlight is light that reaches a subject after being reflected or scattered by surrounding surfaces.
For example, a person standing under a shaded area may receive soft light from the surrounding sky.
This lighting is useful for portraits because it produces more balanced results.
Window Light
Window light is sunlight that enters a room through a window.
It is especially useful for portraits, food photography, product photography, and interior photography.
A large window can work like a natural softbox, producing gentle illumination.
Why Should Beginners Learn Natural Lighting?
Natural light is easily available and does not require additional equipment.
It also helps beginners understand important photography concepts such as exposure, shadows, highlights, and colour temperature.
One of the most useful Natural light photography tips is to observe the direction and quality of light before choosing your camera settings.
Once you understand how light behaves, you can make better creative decisions and improve your photography results. Applying simple Natural light photography tips regularly will also help you develop confidence and recognise good lighting conditions.
2. Learn the Best Time to Photograph in Natural Light
The time of day can completely change the appearance of a photograph.
Sunlight is not equally soft or bright throughout the day. Its direction, intensity, and colour change as the sun moves across the sky.
Choosing the right time can help you capture attractive photographs without complicated lighting equipment.
Morning Light
Morning light is usually softer than midday sunlight, especially shortly after sunrise.
It can create a fresh and peaceful atmosphere.
Morning photography is useful for:
- Outdoor portraits.
- Nature photography.
- Garden photography.
- Landscape photography.
- Lifestyle photography.
Early morning light can also create gentle shadows and warm colours.
For beginners, morning is a good time to practise because the lighting conditions are often easier to manage.
Golden Hour
Golden hour is the period shortly after sunrise and before sunset.
During this time, sunlight appears warm, soft, and golden.
Golden hour photography is popular because it creates beautiful colours and flattering light.
It works especially well for:
- Portrait photography.
- Couple photography.
- Travel photography.
- Landscape photography.
- Outdoor lifestyle photography.
During golden hour, try positioning your subject so that sunlight falls from the side or slightly behind them.
This can create a beautiful glow around the subject.
Midday Light
Midday sunlight is usually stronger and more direct.
It can produce bright highlights and dark shadows, particularly when the sky is clear.
Although many beginners avoid midday photography, it can still be useful.
Look for shaded areas, buildings, trees, or covered spaces that soften the sunlight.
You can also photograph architectural details and objects that benefit from strong directional lighting.
Evening Light
Evening light changes as the sun approaches the horizon.
It often creates warm tones, long shadows, and a relaxing atmosphere.
This lighting is useful for outdoor portraits, landscapes, and travel photographs.
One of the practical Natural light photography tips is to experiment with different times of day and compare how the same subject looks under changing lighting conditions.
The best time depends on your subject, location, weather, and the mood you want to create.
3. Understand the Direction of Natural Light
Natural light photography is the process of capturing images using existing light from natural sources rather than relying on artificial lighting equipment. Learning Natural light photography tips helps beginners understand how to use available light and capture attractive photographs.
The sun is the main source of natural light. However, sunlight is not the only option. Light entering through windows, reflected sunlight, and open-sky illumination can also help create beautiful photographs.
For beginners, understanding natural light is important because it helps you make better decisions before taking a picture. Following Natural light photography tips can help you recognise good lighting conditions and improve your photography skills.
Different Sources of Natural Light
Direct Sunlight
Direct sunlight occurs when the sun’s rays fall directly on a subject.
It creates strong highlights, dark shadows, and high contrast. This lighting can work well for dramatic outdoor photographs.
However, direct sunlight can sometimes create harsh shadows on people’s faces.
Indirect Sunlight
Indirect sunlight is light that reaches a subject after being reflected or scattered by surrounding surfaces.
For example, a person standing under a shaded area may receive soft light from the surrounding sky.
This lighting is useful for portraits because it produces more balanced results.
Window Light
Window light is sunlight that enters a room through a window.
It is especially useful for portraits, food photography, product photography, and interior photography.
A large window can work like a natural softbox, producing gentle illumination.
Why Should Beginners Learn Natural Lighting?
Natural light is easily available and does not require additional equipment.
It also helps beginners understand important photography concepts such as exposure, shadows, highlights, and colour temperature.
One of the most useful Natural light photography tips is to observe the direction and quality of light before choosing your camera settings.
Once you understand how light behaves, you can make better creative decisions and improve your photography results. Applying simple Natural light photography tips regularly will also help you develop confidence and recognise good lighting conditions.
Practising Natural light photography tips in different environments can teach you how to manage changing brightness and shadows. These Natural light photography tips are also useful when experimenting with portraits, landscapes, and indoor photography. With regular practice, you can apply Natural light photography tips to create clearer, more balanced, and attractive photographs.
4. Use Window Light for Beautiful Indoor Photography
Window light is one of the easiest ways to practise natural lighting indoors.
You do not need a professional studio or expensive lighting equipment. A window and a simple subject are enough to get started. Learning Natural light photography tips can help beginners make better use of available indoor light.
The size, direction, and distance of a window affect how light enters a room.
Large windows generally provide more light, while smaller windows may create a more directional effect. Understanding these differences is one of the most useful Natural light photography tips for indoor photography.
Position Your Subject Near a Window
Place your subject close to a window where sufficient natural light is available.
For portrait photography, ask the person to stand slightly beside the window.
This creates gentle shadows and adds depth to the face. Practising Natural light photography tips with different subject positions can help you understand how light changes facial features.
For product photography, place the object on a table near the window.
Use Curtains to Soften Light
Direct sunlight entering through a window can sometimes be too strong.
A thin white curtain can help diffuse the light and create softer illumination.
This is particularly useful when photographing faces, flowers, food, or small products. Using curtains to control brightness is another practical example of Natural light photography tips that beginners can try at home.
Experiment with Different Distances
Moving your subject closer to or farther away from a window changes the lighting effect.
Closer positions usually provide stronger illumination, while greater distances may produce less light.
Try several positions and observe the differences. These experiments will help you apply Natural light photography tips more confidently in different indoor situations.
Control Unwanted Shadows
Look at the shadows on your subject before taking the photograph.
If one side appears too dark, use a white wall or reflector to bounce light back onto the subject.
These Natural light photography tips can help you create attractive indoor photographs with minimal equipment.
Window light photography is also a useful way to practise exposure and composition because you can repeat the same setup whenever you want.
5. Learn How to Use Reflectors
Reflectors help photographers control natural light by bouncing existing light onto a subject. Using reflectors is one of the most useful Natural light photography tips for improving indoor and outdoor photographs.
They are useful for reducing harsh shadows and creating more balanced photographs. Learning these Natural light photography tips can help beginners improve lighting without expensive equipment.
You do not always need to purchase a professional reflector. A white cardboard sheet or a large piece of white paper can work for simple photography projects.
White Reflectors
White reflectors produce soft and natural-looking reflected light.
They are useful for portraits, product photography, and food photography.
Position the reflector opposite the window or sunlight source to brighten the darker side of your subject. This simple technique is among the easiest Natural light photography tips to practise at home.
Silver Reflectors
Silver reflectors bounce more intense light onto the subject.
They can help increase brightness, especially in outdoor photography.
However, they may create stronger highlights than white reflectors. Beginners should experiment with different reflector positions to understand how these Natural light photography tips affect the final image.
Gold Reflectors
Gold reflectors add a warm tone to the reflected light.
They can be useful for outdoor portraits during certain lighting conditions.
However, use them carefully because excessive warmth may affect natural skin colours. Choosing the right reflector for the lighting conditions is an important part of Natural light photography tips.
DIY Reflectors for Beginners
You can experiment with simple household materials:
- White cardboard.
- White foam boards.
- Aluminium foil.
- White paper.
- Light-coloured walls.
Start with a white reflector because it produces a natural-looking result. Practising with these materials is a budget-friendly way to explore Natural light photography tips.
Try moving your DIY reflector closer to and farther from the subject. This helps you see how reflected light changes the brightness and shadows. These Natural light photography tips are especially useful when you do not have access to professional photography equipment.
You can also compare photographs taken with and without a reflector. This exercise helps you understand how small lighting adjustments improve image quality. Applying Natural light photography tips regularly will build your confidence and improve your photography skills.
Learning to control reflected light is one of the most practical Natural light photography tips for beginners who want better exposure without buying additional equipment.
6. Choose the Right Camera Settings
Understanding camera settings is important when working with natural light.
The three main exposure settings are aperture, shutter speed, and ISO.
Together, they control how much light reaches your camera sensor.

Aperture
Aperture controls the size of the opening inside your camera lens.
It is measured using f-numbers such as f/1.8, f/2.8, f/4, and f/8.
A lower f-number allows more light to enter the camera and creates a shallower depth of field.
This is useful for portraits because it can blur the background.
A higher f-number allows less light to enter and keeps more of the scene in focus.
It is useful for landscape and interior photography.
Shutter Speed
Shutter speed controls how long the camera sensor receives light.
A faster shutter speed freezes movement, while a slower shutter speed can create motion blur.
For example:
- 1/1000 sec: Useful for fast-moving subjects.
- 1/500 sec: Useful for outdoor action.
- 1/250 sec: Suitable for many handheld portraits.
- 1/125 sec: Useful for relatively still subjects.
- 1/30 sec: May require a tripod, depending on the lens and camera.
These are starting points rather than fixed rules.
ISO
ISO controls the camera sensor’s sensitivity to light.
A low ISO, such as 100 or 200, generally produces cleaner images with less visible noise.
Higher ISO values are useful when lighting is limited, but they may introduce grain or digital noise.
Try keeping ISO low when sufficient natural light is available.
Recommended Starting Settings
| Photography type | Aperture | Shutter speed | ISO |
|---|---|---|---|
| Outdoor portrait | f/2.8–f/4 | 1/250 | 100–400 |
| Landscape | f/8–f/11 | 1/125 | 100 |
| Indoor portrait | f/1.8–f/2.8 | 1/125 | 400–800 |
| Food photography | f/2.8–f/5.6 | 1/125 | 100–400 |
| Moving subjects | f/2.8–f/4 | 1/500 or faster | 100–800 |
Adjust these settings according to your camera, lens, subject movement, and lighting conditions.
One of the most important Natural light photography tips is to understand the exposure triangle instead of copying camera settings without considering the available light.
For beginners, aperture priority mode is a useful starting point because it allows you to control depth of field while the camera selects a suitable shutter speed.
7. Understand Soft Light and Hard Light
Light quality plays an important role in photography. Understanding light quality is one of the essential Natural light photography tips for beginners.
Two common lighting conditions are soft light and hard light. Learning how to identify them will help you apply Natural light photography tips more effectively in different photography situations.
What Is Soft Light?
Soft light produces gentle shadows and smooth transitions between bright and dark areas.
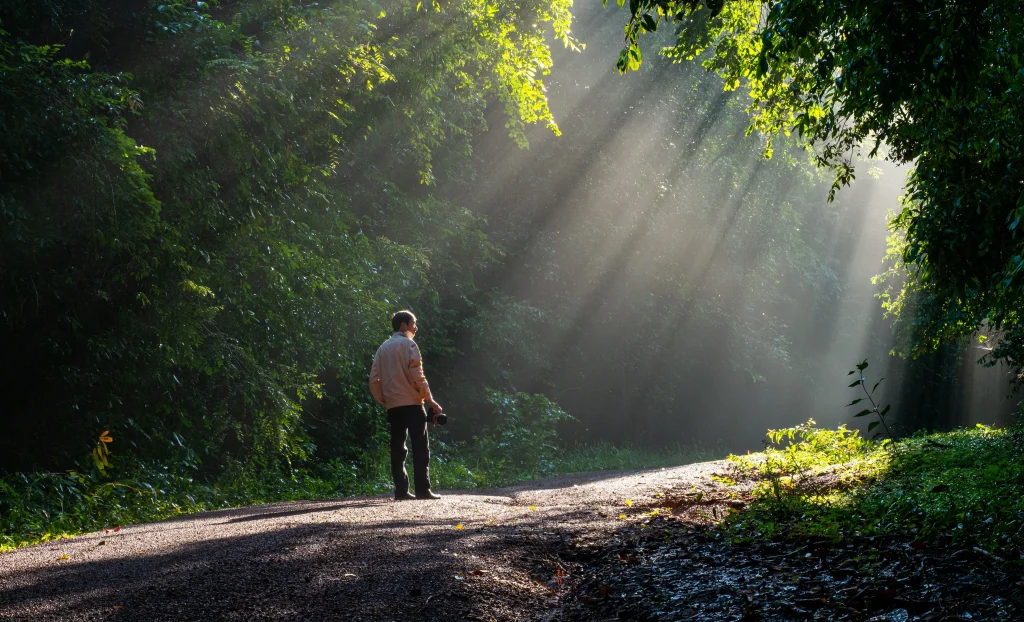
It is often created when sunlight passes through clouds, curtains, or other diffusing materials.
Soft light is useful for:
- Portrait photography.
- Food photography.
- Product photography.
- Wedding photography.
- Interior photography.
It helps maintain natural-looking colours and reduces harsh shadows. Choosing soft light is one of the practical Natural light photography tips for capturing balanced and attractive photographs.
What Is Hard Light?
Hard light produces sharp shadows and strong contrast.
Direct sunlight on a clear day is a common example.
Hard light can create dramatic photographs with strong textures and defined shapes.
It is useful for architectural photography, creative portraits, and artistic photography. Experimenting with hard light is another way to practise Natural light photography tips and develop your creative skills.
How to Find Soft Natural Light
Look for shaded areas, large windows, cloudy weather, and covered outdoor spaces.
You can also use a diffuser to soften direct sunlight.
The goal is not always to find the brightest light. Instead, look for lighting that suits your subject and the mood you want to create.
Try photographing the same subject in both soft and hard light. Comparing the results is one of the most effective Natural light photography tips for understanding shadows, contrast, and light quality.
Learning the difference between hard and soft light is one of the useful Natural light photography tips for beginners who want to improve their photography. for beginners.
8. Practise Outdoor Natural Light Photography
Outdoor photography provides many opportunities to work with changing natural light.
You can photograph people, buildings, flowers, landscapes, and everyday objects without setting up a lighting studio.
Find Open Shade
Open shade is an area protected from direct sunlight but still illuminated by the open sky.
It is useful for portrait photography because it creates more even lighting.
Look for shaded areas near buildings, trees, or covered walkways.
Avoid placing your subject directly under trees with small gaps between the leaves, as this can create uneven patches of sunlight.
Use Natural Backgrounds
Choose backgrounds that complement your subject.
Trees, walls, gardens, and open landscapes can create attractive backgrounds.
Keep the background simple so that the main subject remains easy to understand.
Watch the Weather
Weather conditions can change the appearance of natural light.
Sunny weather produces stronger shadows, while cloudy conditions often create softer illumination.
Rainy weather can also create interesting reflections and colours.
Photograph During Different Seasons
The quality and direction of sunlight change throughout the year.
Seasonal changes can create different opportunities for landscape, nature, and portrait photography.
For beginners, photographing the same location during different seasons is a useful way to understand natural lighting.
These Natural light photography tips can help you become more comfortable with outdoor lighting conditions.
9. Avoid Common Natural Lighting Mistakes
Learning photography involves making mistakes and understanding how to correct them. Following Natural light photography tips can help beginners recognise common lighting problems and improve their photographs.
Beginners often struggle with exposure, shadows, and colour when using natural light. Understanding these Natural light photography tips makes it easier to handle different lighting conditions.
Here are some common problems to avoid.
Overexposed Photographs
Overexposure happens when too much light reaches the camera sensor.
Bright areas may lose detail and appear completely white.
To correct this, reduce exposure compensation, adjust shutter speed, or use a smaller aperture. Learning to control exposure is one of the most important Natural light photography tips for beginners.
Underexposed Photographs
Underexposure happens when the image does not receive enough light.
The photograph may appear too dark, especially in shadow areas.
Increase exposure by adjusting your camera settings or moving your subject closer to the light source.
Harsh Shadows on Faces
Direct sunlight can create dark shadows around the eyes, nose, and chin.
Move your subject into open shade or use a diffuser to soften the light. These Natural light photography tips can help you capture more balanced portraits.
Incorrect White Balance
White balance controls how your camera records colour temperature.
Incorrect white balance can make photographs look too yellow, blue, or orange.
Try using daylight, cloudy, or shade presets depending on the lighting conditions.
You can also shoot in RAW format and adjust white balance during editing. Understanding colour temperature is another useful part of Natural light photography tips.
Ignoring the Background
A beautiful subject can still look unattractive if the background is distracting.
Before taking a photograph, check for unwanted objects, bright spots, and clutter.
Practising Natural light photography tips in different environments will help you recognise distracting elements and improve your composition.
Review your photographs after each session to identify exposure and lighting mistakes. Applying these Natural light photography tips regularly can help you develop better photography habits.
These Natural light photography tips can help beginners avoid common lighting problems and create more consistent photographs.
10. Improve Composition Along with Natural Lighting
Good lighting is important, but composition also affects the quality of a photograph. Understanding composition is an important part of Natural light photography tips for beginners.
Composition describes how objects are arranged within the frame.
A well-composed image guides the viewer’s attention towards the main subject. Combining composition skills with Natural light photography tips can help you create more attractive photographs.
Use the Rule of Thirds
Imagine dividing your photograph into nine equal sections using two horizontal and two vertical lines.
Place important elements along these lines or near their intersections.
This creates a balanced composition. Practising the rule of thirds is one of the useful Natural light photography tips for improving your photography skills.
Try Leading Lines
Leading lines guide the viewer’s eyes towards the main subject.
Examples include roads, pathways, window edges, walls, and building structures.
Use these elements to create depth and visual interest. Applying Natural light photography tips while using leading lines can make your photographs look more engaging.
Leave Negative Space
Negative space refers to the empty areas surrounding the main subject.
It helps the subject stand out and prevents the photograph from looking crowded.
This technique works well for product photography, portraits, and landscape images. Learning to balance empty space and natural lighting is another practical example of Natural light photography tips.
Experiment with Different Angles
Do not take every photograph from eye level.
Try shooting from a lower position, a higher angle, or from the side.
Changing your position can create a more interesting composition. Experimenting with different viewpoints is one of the creative Natural light photography tips beginners can practise.
Try combining different camera angles, composition techniques, and lighting conditions to discover what works best for your subject. These Natural light photography tips can help you develop a stronger photographic style.
Combining good composition with suitable lighting is one of the most effective Natural light photography tips for creating professional-looking images.
11. Try Natural Light Photography in Different Genres
Natural light can be used across many photography styles.
Each genre requires a slightly different approach.
Portrait Photography
Portrait photography focuses on capturing people and their expressions.
Window light and golden hour are popular choices because they can create soft and flattering illumination.
Position your subject near a window or in open shade.
Use a wider aperture when you want a blurred background.
Food Photography
Food photography benefits from soft side lighting.
Place the food near a window and allow light to fall across its surface.
This helps highlight textures, colours, and details.
Avoid using direct sunlight when it creates overly strong highlights.
Product Photography
Product photography requires clear details and accurate colours.
Use a large window as your primary light source.
A white reflector can help brighten darker areas.
Keep the background simple and make sure the product is properly exposed.
Landscape Photography
Landscape photography often benefits from early morning and late evening light.
These periods can create attractive colours, shadows, and depth.
Use a tripod when shooting at slower shutter speeds.
A smaller aperture can help maintain sharpness throughout the scene.
Interior Photography
Interior photography often relies on daylight entering through windows and doors.
Open curtains to allow more light into the room.
Pay attention to bright windows and darker corners.
Use a tripod when necessary and consider exposure bracketing for scenes with a wide brightness range.
Understanding how lighting works across different photography genres is one of the valuable Natural light photography tips for developing your skills.
12. Practise Natural Light Photography Every Day
The best way to improve your photography is through regular practice.
You do not need to travel to beautiful locations or purchase expensive camera equipment.
Start with simple objects and familiar places.
Here are some exercises you can try.
Exercise 1: Photograph the Same Subject at Different Times
Choose a flower, chair, or household object.
Photograph it in the morning, afternoon, and evening.
Compare the changes in colour, brightness, and shadows.
Exercise 2: Experiment with Light Direction
Photograph the same subject using front lighting, side lighting, and backlighting.
Notice how the appearance changes.
Exercise 3: Practise Window Light
Place a simple object near a window.
Move it closer and farther away.
Try using a white reflector to brighten the shadows.
Exercise 4: Photograph in Open Shade
Find a shaded outdoor location.
Take photographs of the same subject in direct sunlight and open shade.
Compare the differences in contrast and shadow quality.
Exercise 5: Learn Manual Exposure
Start using aperture priority or manual mode.
Change one exposure setting at a time and observe how the photograph changes.
Regular practice is among the most important Natural light photography tips because it helps you understand lighting through experience rather than relying only on theory.
Frequently Asked Questions
1. What is the best natural light for photography?
Soft natural light is often the easiest lighting condition for beginners. Morning light, evening light, cloudy weather, and window light can produce attractive photographs with gentle shadows.
2. What is the best time of day for natural light photography?
The golden hour, shortly after sunrise and before sunset, is popular because it produces warm and softer sunlight. However, the best time depends on your subject and the style of photography.
3. Can I take good photographs without artificial lighting?
Yes. You can capture beautiful photographs using sunlight, window light, reflected light, and open shade. A camera and an understanding of exposure are enough to get started.
4. What camera settings should beginners use in natural light?
Start with a low ISO when sufficient light is available. Use a wider aperture for portraits and a smaller aperture for landscapes. Adjust shutter speed according to subject movement and available light.
5. How do I take better indoor photographs using natural light?
Place your subject near a large window, use curtains to soften direct sunlight, and experiment with reflectors to brighten shadows. Avoid mixing different light sources when accurate colours are important.
6. Is cloudy weather good for photography?
Yes. Cloudy weather can create soft and even lighting. It is particularly useful for portraits, flowers, and outdoor photography because it reduces harsh shadows.
7. Do I need a professional camera for natural light photography?
No. Beginners can practise with smartphones, entry-level cameras, or professional cameras. Understanding light, exposure, and composition is more important than owning expensive equipment.
8. How can I avoid harsh shadows in natural light photography?
Move your subject into open shade, use a diffuser, or photograph during morning and evening hours. A reflector can also help brighten darker areas.
Conclusion
Natural light is one of the most useful resources available to photographers. It allows you to capture beautiful images without relying on expensive lighting equipment.
Understanding light direction, timing, exposure, and composition can make a noticeable difference in your photographs.
Start by practising with simple subjects near windows or outdoors. Experiment with morning light, golden hour, open shade, and different camera settings.
Remember that photography improves through practice. Do not worry about achieving perfect results immediately.
The best way to improve is to observe how light changes, experiment with different techniques, and learn from every photograph you take.
By applying these Natural light photography tips, beginners can develop stronger photography skills and create attractive images using the light that is already available around them.
SEO Publishing Checklist
- Add a relevant featured image with descriptive alt text.
- Use the primary keyword naturally in the introduction and selected headings.
- Add descriptive alt text to all supporting photographs.
- Link internally to related articles about portrait photography, interior photography, and camera settings.
- Include relevant external links to authoritative photography education resources.
- Add an author bio and original photographs to strengthen content credibility.
- Use FAQ structured data only when the page meets Google’s current structured-data requirements.
- Keep paragraphs short and use descriptive headings.
- Review the published page on both desktop and mobile devices.
Pingback: 28 Portrait Photography Tips: Capture Beautiful Portraits
Pingback: best Still Life Photography for Beginners: Complete Guide in 2026
Pingback: Best Real Estate Photography for Beginners: Full Guide 2026